Re: Let's practice STICK WELDING, and proper weld bead applications.
Very good informative post Bro Rosy.
Thanks for taking the time to post the info.
Millermatic 180 Autoset Mig Welder
Miller Spoolmate 100 Spool Gun
Victor Firepower 350 Oxy Ace Outfit
3M Speedglas 9002X AD Helmet
Makita LC1230 Dry Cut Saw
Ingersoll Rand Air Tools
Snap On Tools
Metabo Power Tools
Norseman Drill Cutting Tools
Bosch Power Tools
3M PPS
Re: Let's practice STICK WELDING, and proper weld bead applications.
Yes bro rosy, I'm very well familiar with those illustrations. I actually perfomed 6G pipe welding in my shared video.
:boom1:[COLOR="Navy"]
Re: Let's practice STICK WELDING, and proper weld bead applications.
@ bro JayL,
HAHAHAHA, thanks bro, I just hope with these simple line illustrations, viewers will easily understand the different welding positions and applications for stick welding.
Actually bro I intended to post these line drawings last week pa but got so busy with other projects and matters here so a bit delayed. I wanted to re draw it again but my drafting pens have dried up already so I just used my sign pens which were not so accurate and sharp when applied plus thinking of adding some colors to make it more attractive but scrapped the idea. 🙁
Anyway I think the illustrations can still be easily understood and at least we have now a guide for practice welding specially on how and what position to use, but of course we always start with the flat position which is the easiest. 😀
@ bro kabasor,
Bro, in the video you shared, were you the one in the leather orange jacket welding or the one with the yellow welding helmet or those other guys around. Just can't finish the whole video coz medyo mabagal ang takbo ng video, patigil tigil, hehehe :p
Thanks bro !!!!:cool:
CIGWELD Weldskill 250 amp Mig Welder
AHP Alpha-TIG 200X welder
HITRONIC 300 Amp DC Inverter IGBT Welder
YAMATO 300 amp AC Stick Welder
YAMATO 200 amp DC Inverter IGBT Welder
DeWALT Chopsaw
HOBART and ESAB Welding Helmets
cloned STIHLs
MS 044 chainsaw
MS 070 chainsaw
Re: Let's practice STICK WELDING, and proper weld bead applications.
OK, now I will discuss here some electrode identifications and what those numbers means printed on the welding rods/electrodes I am going to use for this practice, particularly the E6011, E6013 and E7018 rods.
I will be specific on these three welding rods only so not to confuse others since this thread will simply be a basic practice to start you off in welding using thicker metal/materials. The infos I will share will be based on the writings made by BRUCE BAUERLEIN's " A Basic Guide of Arc Welding Electrodes ".
Arc welding electrodes are identified using the A.W.S. ( American Welding Society ) numbering system and are made in sizes from 1/16" to 5/16" diameter rods. Let's take for example a welding rod identified as 1/8" E6011 electrode :
E6011 electrode, 1/8" :
1/8" ------------ stands for the diameter of the electrode without the flux coating.
" E " ------------ stands for the arc welding electrode.
" 60 " ------------ stands for the minimum tensile strength of 60,000 psi (per square inch).
" 1 " ------------ stands for the welding position, which means this rod can be used for all
welding positions, flat, horizontal, vertical ( UP or DOWN ) and overhead.
" 1 " ------------ this last digit stands for the type of coating in various welding electrodes.
meaning this rod has a coating of cellulose Potassium with a welding
current for AC or DC .
This E6011 rod is usually used for root passes because of its deep penetrating welds.
E6013 electrode, 1/8" :
1/8" ------------ diameter of the welding rod without the flux coating.
" E " ------------ stands for the arc welding electrode.
"60 " ------------ stands for the minimum tensile strength of 60,000 psi (per square inch).
" 1 " ------------ stands for all welding positions, good for flat, horizontal, vertical, overhead.
" 3 " ------------ this last digit stands for the type of coating it carries, titania potassium with
with a welding current for AC or DC.
This E6013 rod is a general purpose electrode that produces a medium penetrating weld but with a superior weld bead appearance.
E7018 electrode, 1/8" :
1/8" ------------ stands for the diameter of the rod without the flux coating.
" E " ------------ stands for the arc welding electrode.
"70 " ------------ stands for the minimum tensile strength of 70,000 psi (per square inch).
" 1 " ------------ stands for the welding position, cam be used for flat, horizontal, vertical
and overhead welding positions.
" 8 " ------------ this no. stands for the type of coating it carries, iron powder, low
hydrogen with a welding current of AC or DC.
This E7018 rod is usually used for hot passes, preferred for its high purity, crack resistant welds on mild and carbon steel. This rod must be kept dry at all times and if it gets wet, must be dried in a rod oven for at least 30 minutes before use.
[COLOR="Red"]NOTE !!! The thicker the material to be welded, the higher the current needed and the larger the electrode needed.
This is my version of enumerating the meanings of the numbers printed on the welding electrodes to make it easy to understand, but still based on the articles of the author or writer plus the booklet I got from my friend who also graduated from Tesda welding courses with flying colors.
CIGWELD Weldskill 250 amp Mig Welder
AHP Alpha-TIG 200X welder
HITRONIC 300 Amp DC Inverter IGBT Welder
YAMATO 300 amp AC Stick Welder
YAMATO 200 amp DC Inverter IGBT Welder
DeWALT Chopsaw
HOBART and ESAB Welding Helmets
cloned STIHLs
MS 044 chainsaw
MS 070 chainsaw
Re: Let's practice STICK WELDING, and proper weld bead applications.
TO CONTINUE WITH THE INFOS !!!
ELECTRODE SIZE and AMPS USED :
The following will serve as a basic guide of the amp range that ca be used for different size electrodes. Note that this ratings can be different between various electrode manufacturers for the same size rod.
Also the type coating on the electrode could affect the amperage range. When possible, check the manufacturers info of the electrode that will be used for their recommended amperage settings.
ELECTRODE TABLE :
Electrode Diameter _____ Ampere Range_____Plate
1/16" --------------------------- 20 - 40 ----------------- up to 3/16" thickness
3/32" --------------------------- 40 -125 ---------------- up to 1/4" thickness
1/8" ---------------------------- 75 - 185 -------------- over 1/8" thickness
5/32" --------------------------- 105 - 250 ------------- over 1/4" thickness
3/16" --------------------------- 140 - 305 ------------- over 3/8" thickness
1/4" ---------------------------- 210 - 430 ------------ over 3/8" thickness
5/16" -------------------------- 275 - 450 ----------- over 1/2" thickness
[COLOR="Red"]NOTE !!! The thicker the material to be welded, the higher the current needed and the larger the electrode needed.
CIGWELD Weldskill 250 amp Mig Welder
AHP Alpha-TIG 200X welder
HITRONIC 300 Amp DC Inverter IGBT Welder
YAMATO 300 amp AC Stick Welder
YAMATO 200 amp DC Inverter IGBT Welder
DeWALT Chopsaw
HOBART and ESAB Welding Helmets
cloned STIHLs
MS 044 chainsaw
MS 070 chainsaw
Re: Let's practice STICK WELDING, and proper weld bead applications.
To continue with the necessary infos :
Supposing we are to weld two semi thick metal plates or bars using the simple joint called " butt joint ", putting them together side by side might just work temporarily but in the long run the welded joints will not last because the welds applied on the joints were just above or under the two metals, there will still be some gap in between the two metals specially in the middle where the metal fusion did not reach and this gap will weaken the joints in the long run. 😮
I have here another set of graphic illustrations I made, again for the purpose of easier understanding visually. 😉
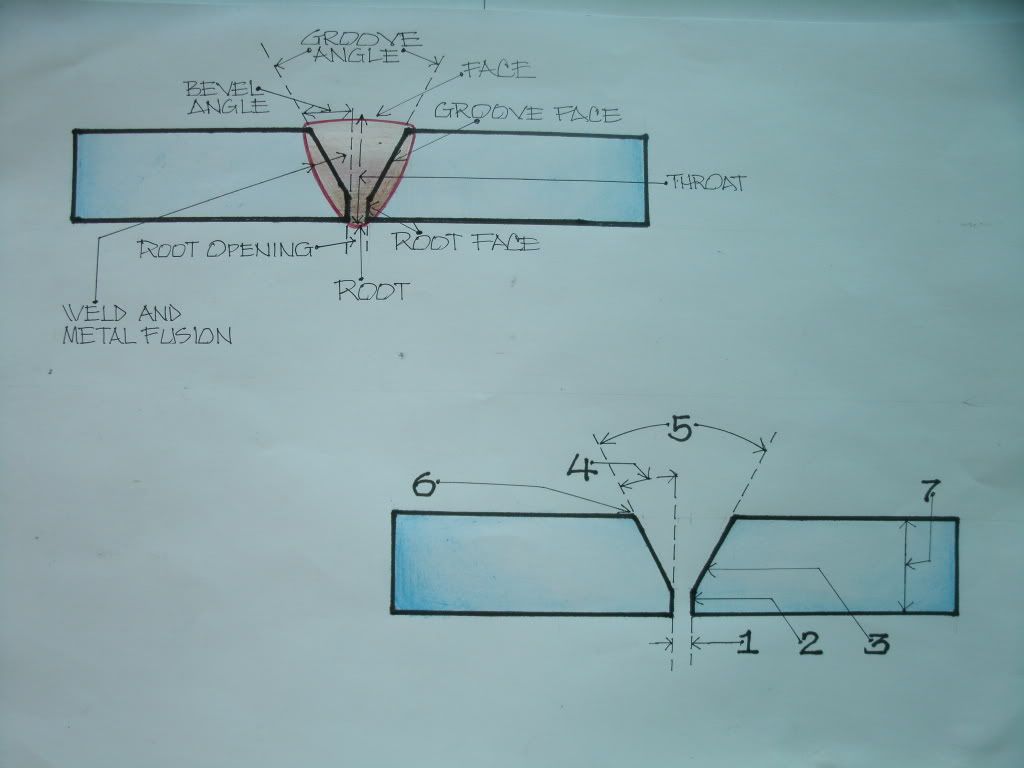
You have to look closely that the two pieces of metal plates being joined have been beveled on each side to be welded, study closely and understand each part meaning.
And for the second illustration below, here are each number descriptions :
1. ROOT OPENING( RO ). The separation between the members to be joined at the root of the joint.
2. ROOT FACE( RF ). Groove face adjacent to the root of the joint.
3. GROOVE FACE( GF ). The surface of the member included in the groove.
4. BEVEL ANGLE( A ). The angle formed between the prepared edge of a member and a plane perpendicular to the surface of the member.
5. GROOVE ANGLE( A ). The total included angle of the groove between parts to be joined by a groove weld.
6. SIZE of WELD( S ). The joint penetration (depth of bevel plus the root penetration when specified). The size of the groove weld and its effective throat are one and the same.
7. PLATE THICKNESS( T ). Thickness of plate welded.
CIGWELD Weldskill 250 amp Mig Welder
AHP Alpha-TIG 200X welder
HITRONIC 300 Amp DC Inverter IGBT Welder
YAMATO 300 amp AC Stick Welder
YAMATO 200 amp DC Inverter IGBT Welder
DeWALT Chopsaw
HOBART and ESAB Welding Helmets
cloned STIHLs
MS 044 chainsaw
MS 070 chainsaw
Re: Let's practice STICK WELDING, and proper weld bead applications.
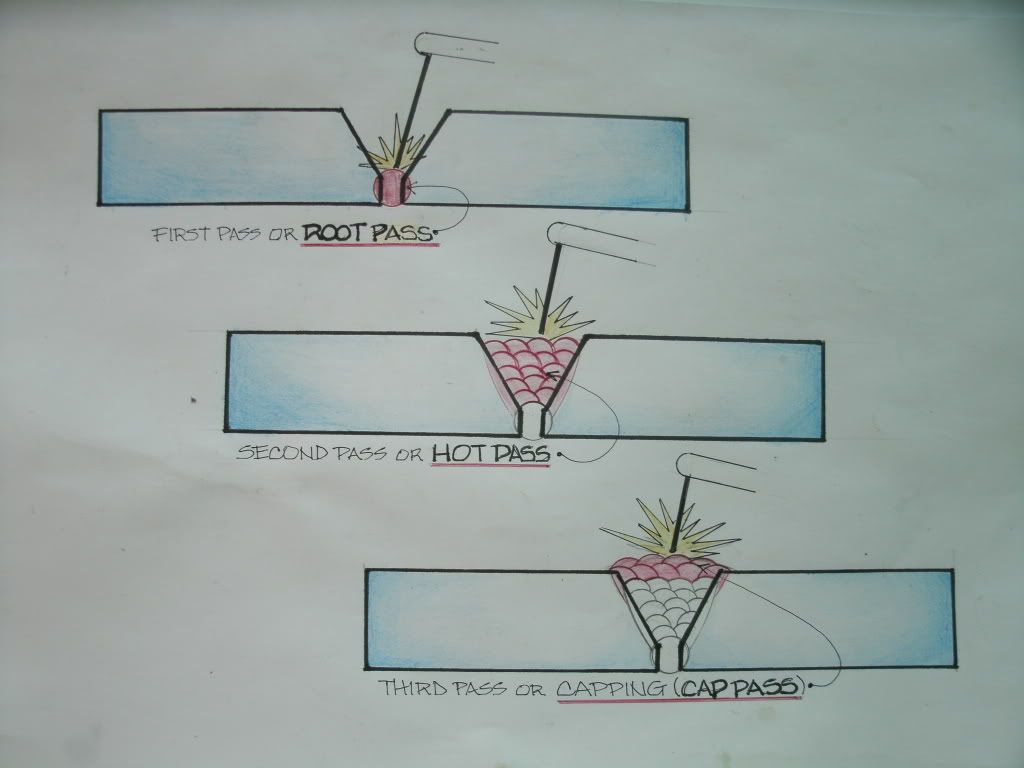
And then we have three different kinds of weld pass :
KINDS OF WELD PASS :
1. First Pass --- The initial pass of welding rod or otherwise called a ROOT PASS.
2. Second Pass --- The second pass of the welding rod or otherwise called a HOT PASS.
This pass may be one or as many layers as it needs to fill the cavity.
3. Third Pass --- The last pass of welding rod or otherwise called a CAP PASS or CAPPING.
Here are the graphic illustrations for these three kinds of weld pass:
But if you will be joining or welding thinner metal plate of about 1/8" thick and below or some ordinary sheet metal, then making a bevel cut will not be necessary, just go ahead and apply those weld beads and let the welding electrodes burn the metal by leaving a gap of 1/16" or smaller pa between the two metals for fusion.
To be continued .......................
CIGWELD Weldskill 250 amp Mig Welder
AHP Alpha-TIG 200X welder
HITRONIC 300 Amp DC Inverter IGBT Welder
YAMATO 300 amp AC Stick Welder
YAMATO 200 amp DC Inverter IGBT Welder
DeWALT Chopsaw
HOBART and ESAB Welding Helmets
cloned STIHLs
MS 044 chainsaw
MS 070 chainsaw
Re: Let's practice STICK WELDING, and proper weld bead applications.
@rosy
at what thickness would you need to bevel the edges?
Posted via PHM Mobile
Re: Let's practice STICK WELDING, and proper weld bead applications.
@ bro zepol,
I start beveling metal plates or bars when it gets to 3/16" to 1/4" thickness, if that is doing a butt joint, just making sure I achieve a good fusion of the metal edges. :thumbup: Actually bro, in the illustrations above, I made an actual size thickness of a presumed 1" inch metal plate so it can easily be understood. !!
But for thinner or not so thick plates or bars, I leave a little gap between the two metal to be joined so that my welds will penetrate the backside of the gap making a metal fusion. 😉
CIGWELD Weldskill 250 amp Mig Welder
AHP Alpha-TIG 200X welder
HITRONIC 300 Amp DC Inverter IGBT Welder
YAMATO 300 amp AC Stick Welder
YAMATO 200 amp DC Inverter IGBT Welder
DeWALT Chopsaw
HOBART and ESAB Welding Helmets
cloned STIHLs
MS 044 chainsaw
MS 070 chainsaw
Re: Let's practice STICK WELDING, and proper weld bead applications.
Since I have posted some basic information and some graphic illustrations for easier understanding, I think its time to start with this practice welding on thicker metals. Have purchased some metal scraps at nearby junk shop.
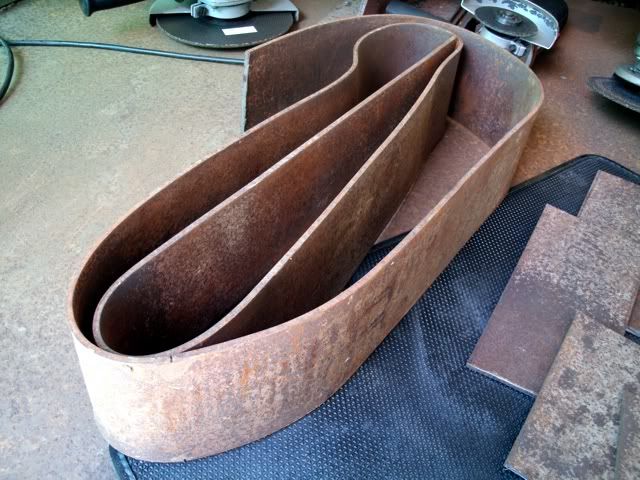
Purchased this scrap flat bar with thickness of 3/16" X 4".
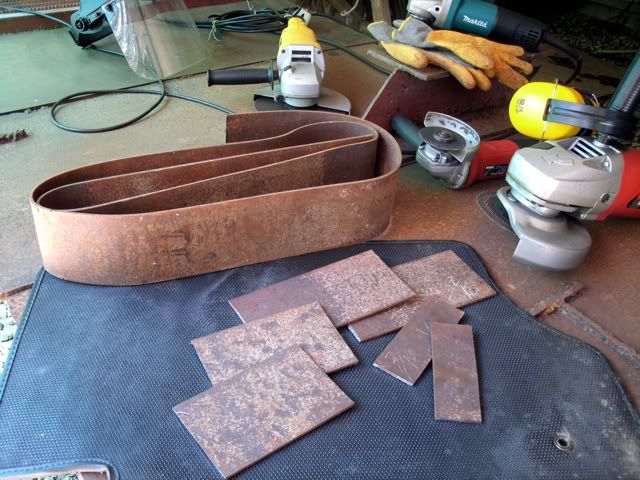
Have started to cut some pieces for the practice, about 6" and 8" in length and also sliced up one in the middle to get a 2" X 6". Maybe I'll cut some more if needed.
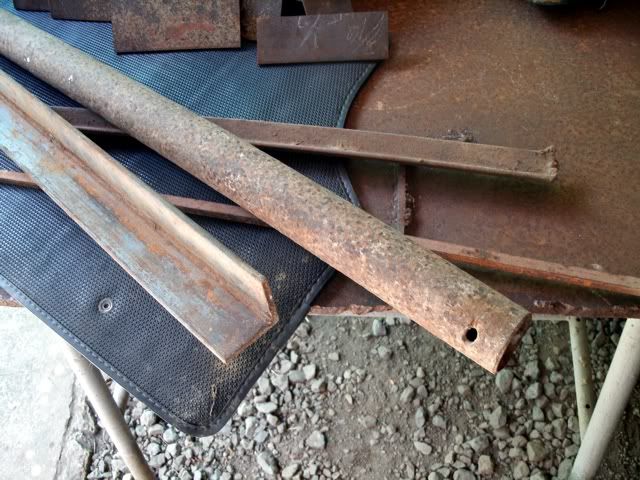
Some additional purchase too, scrap angle bars, square bar and a 1 1/2" pipe.
I'll get probably too some thicker metals, say 1/4" or 5/16" or 3/8" thick in the coming days, so I guess I'll be starting soon striking those welding rods on these scrap metals. :win:
CIGWELD Weldskill 250 amp Mig Welder
AHP Alpha-TIG 200X welder
HITRONIC 300 Amp DC Inverter IGBT Welder
YAMATO 300 amp AC Stick Welder
YAMATO 200 amp DC Inverter IGBT Welder
DeWALT Chopsaw
HOBART and ESAB Welding Helmets
cloned STIHLs
MS 044 chainsaw
MS 070 chainsaw
Re: Let's practice STICK WELDING, and proper weld bead applications.
I guess its time now to start applying welds on these scrap metals that I have prepared. But first, my set up.
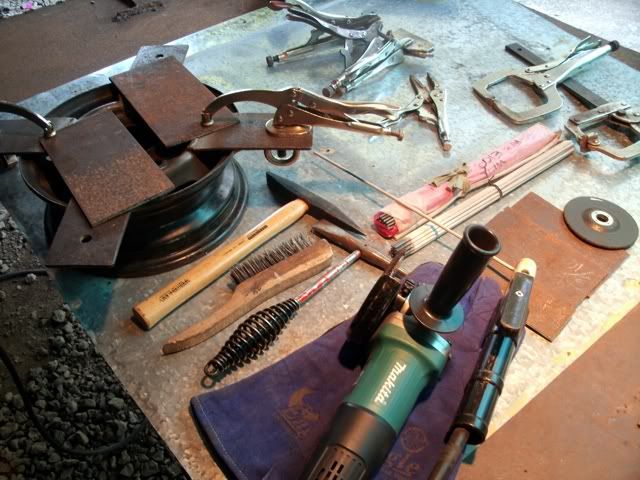
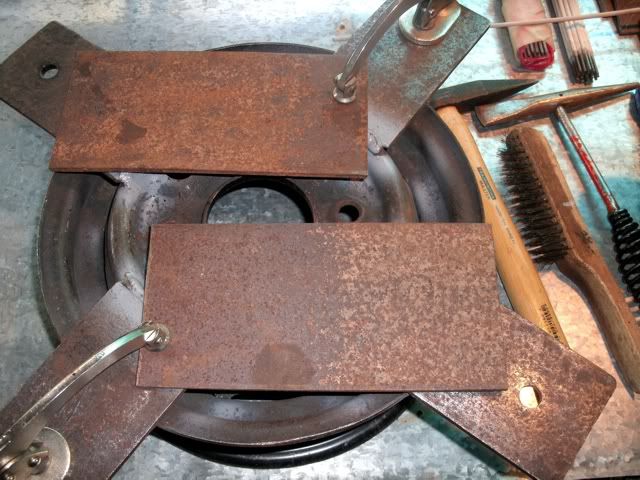
Here's my set up, preparation prior to welding but seeing my plates to be rusty, I decided to somewhat do some disc sanding on the surface of the metal plates.
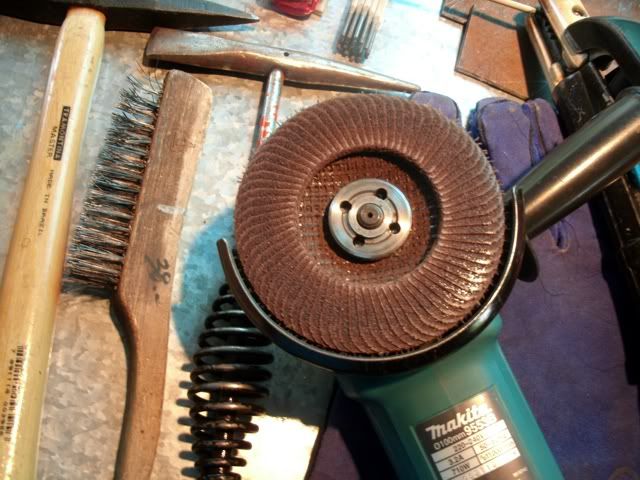
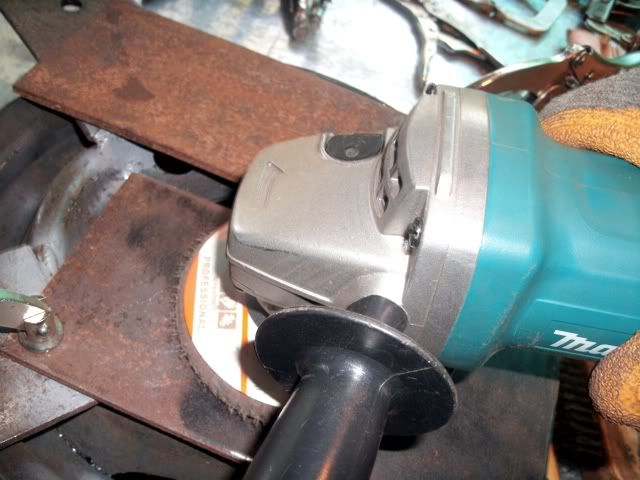
Started sanding the metal plate surface though the rust will never matter when I start applying welds using a stick welder, its just that I wanted my metal plates to be sort of "clean" before I start applying welds.
CIGWELD Weldskill 250 amp Mig Welder
AHP Alpha-TIG 200X welder
HITRONIC 300 Amp DC Inverter IGBT Welder
YAMATO 300 amp AC Stick Welder
YAMATO 200 amp DC Inverter IGBT Welder
DeWALT Chopsaw
HOBART and ESAB Welding Helmets
cloned STIHLs
MS 044 chainsaw
MS 070 chainsaw
Re: Let's practice STICK WELDING, and proper weld bead applications.
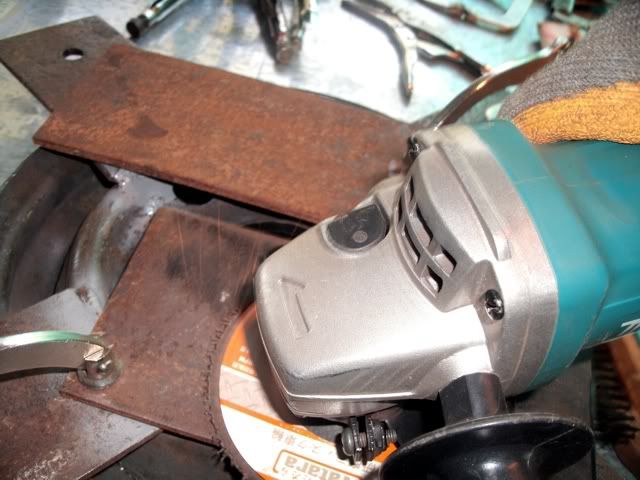
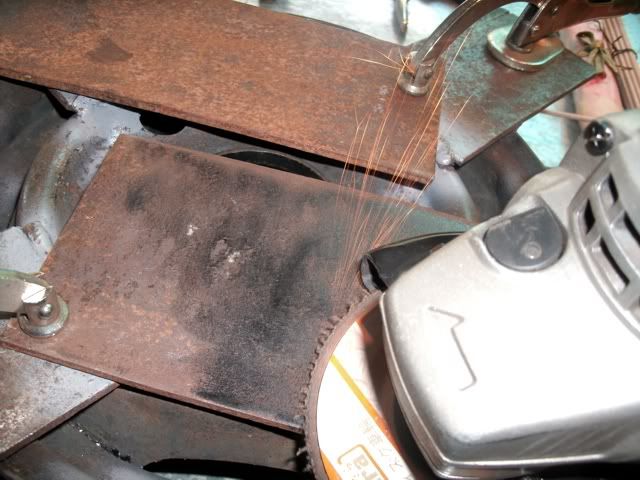
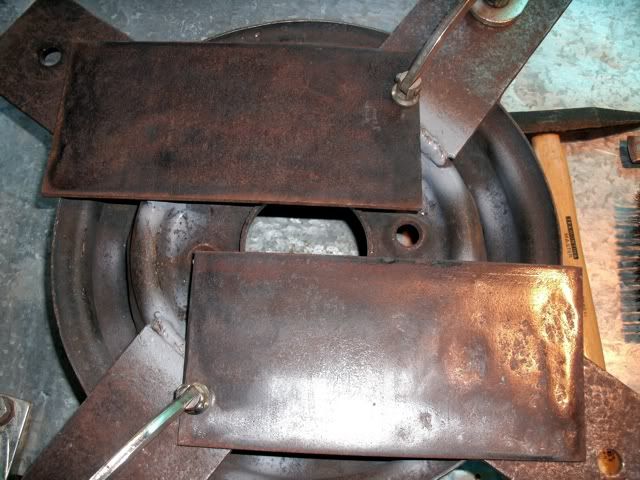
Then continued sanding the metal plate surface until it became shinny and smooth to the touch, now the plate is ready to receive some weld beads, :banana2:
CIGWELD Weldskill 250 amp Mig Welder
AHP Alpha-TIG 200X welder
HITRONIC 300 Amp DC Inverter IGBT Welder
YAMATO 300 amp AC Stick Welder
YAMATO 200 amp DC Inverter IGBT Welder
DeWALT Chopsaw
HOBART and ESAB Welding Helmets
cloned STIHLs
MS 044 chainsaw
MS 070 chainsaw
Re: Let's practice STICK WELDING, and proper weld bead applications.
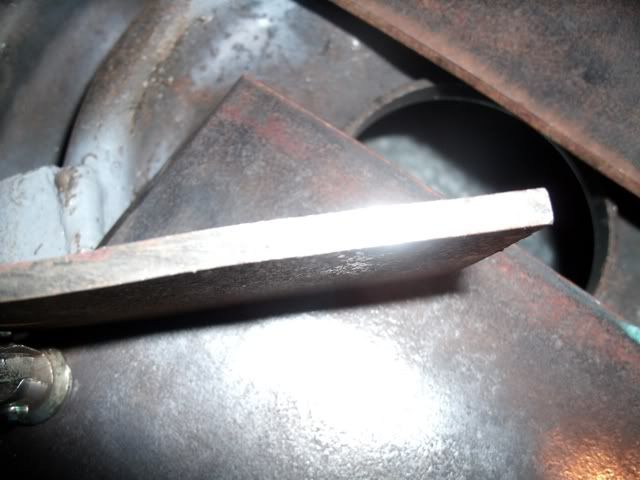
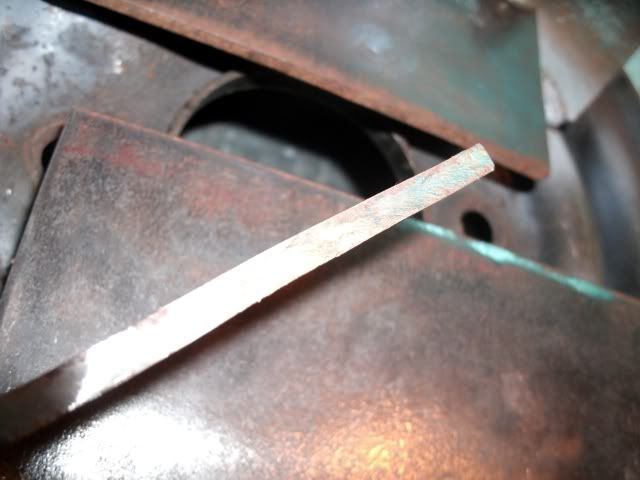
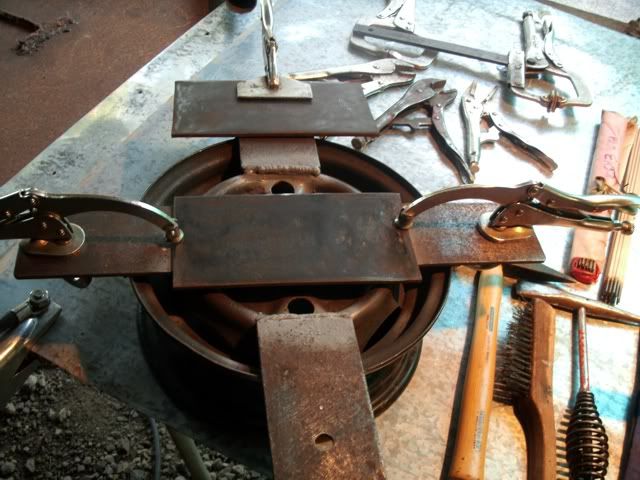
Since the metal plate is not that thick, only 3/16", I decided to have both ends secured by clamps just to make sure that the metal plate will not be so warped or distorted when it is subjected to extreme heat during weld bead applications. :rolleyes:
To be continued.......................
CIGWELD Weldskill 250 amp Mig Welder
AHP Alpha-TIG 200X welder
HITRONIC 300 Amp DC Inverter IGBT Welder
YAMATO 300 amp AC Stick Welder
YAMATO 200 amp DC Inverter IGBT Welder
DeWALT Chopsaw
HOBART and ESAB Welding Helmets
cloned STIHLs
MS 044 chainsaw
MS 070 chainsaw
Re: Let's practice STICK WELDING, and proper weld bead applications.
AND TO CONTINUE WITH THE PRACTICE AND WELD BEAD APPLICATIONS..........
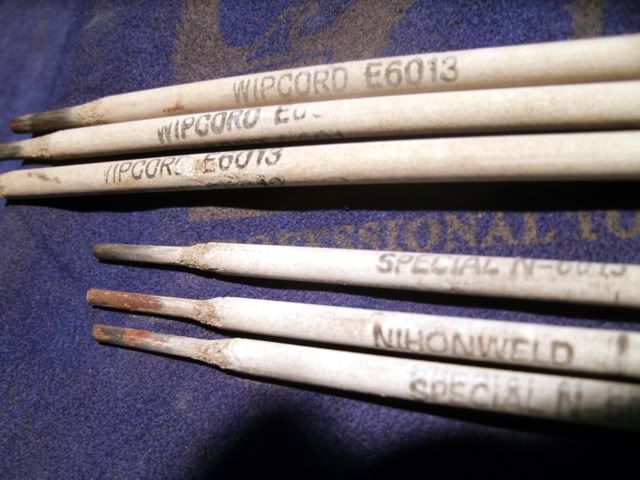
For starters, I'll be using Nihonweld special 3/32" rods and Wipcord 1/8" rods of E6013.
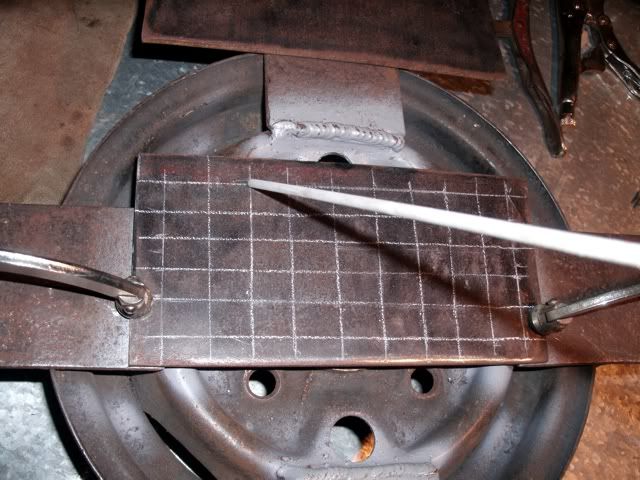
I made some grid on the plate using chalk stone so that I can apply the weld beads on every intersection and produce beads in rows uniformly and for this first plate.
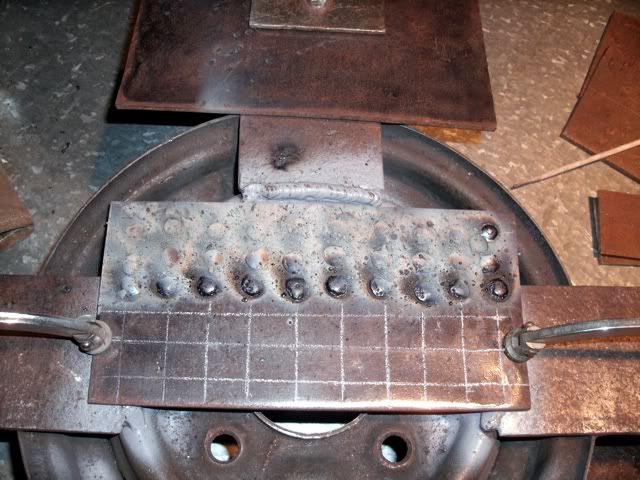
Here's the first half of welds applied. Used the 3/32" welding electrode, flat position and set my amperage to 90amp, using an AC stick welder.
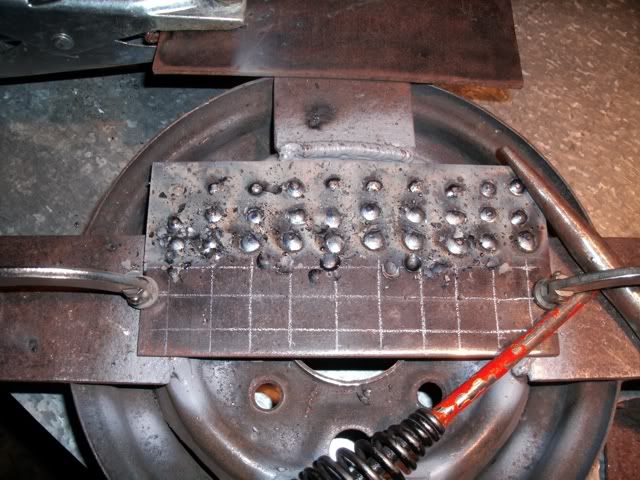
Used my chipping hammer, lightly tapping each weld bead to expose the clean weld beads deposited on the plate.
CIGWELD Weldskill 250 amp Mig Welder
AHP Alpha-TIG 200X welder
HITRONIC 300 Amp DC Inverter IGBT Welder
YAMATO 300 amp AC Stick Welder
YAMATO 200 amp DC Inverter IGBT Welder
DeWALT Chopsaw
HOBART and ESAB Welding Helmets
cloned STIHLs
MS 044 chainsaw
MS 070 chainsaw
Re: Let's practice STICK WELDING, and proper weld bead applications.
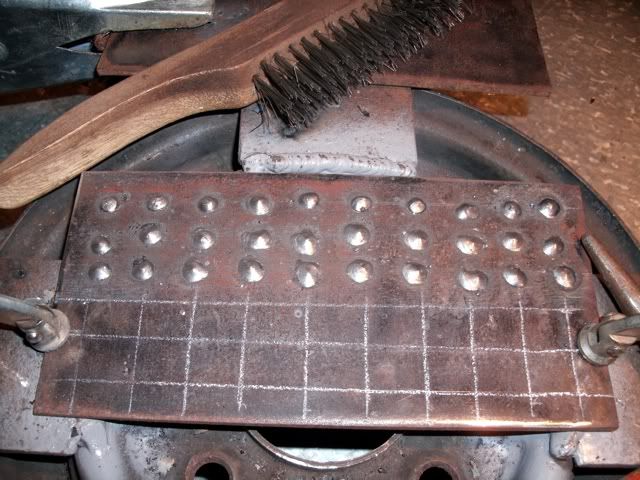
And the weld beads exposed and cleaned with a wire brush. As I was applying the welds, I was counting 5 second for each bead to find out the length of time to be able to produce a satisfactory weld bead. And also for this first half, I spent 1 1/2 welding electrode, more or less.
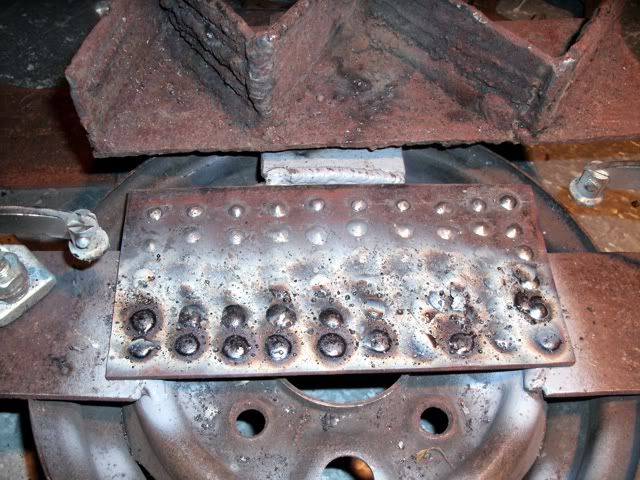
Then continued applying welds on the second half of the plate and increased my counting to 6 or 7 seconds.
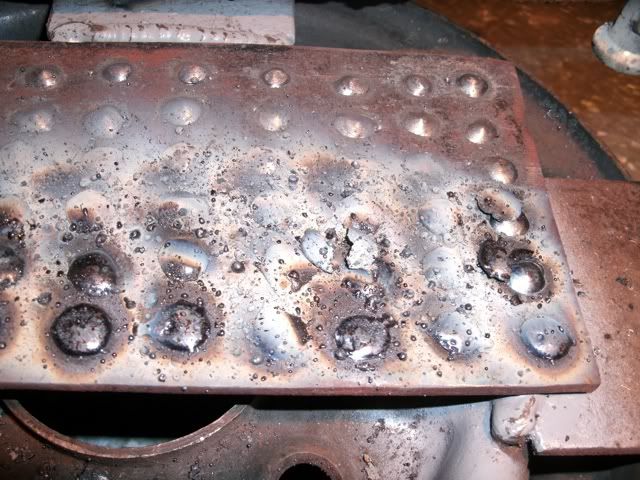
If you can see on this pic, slags are somewhat dislodging itself from the weld bead.
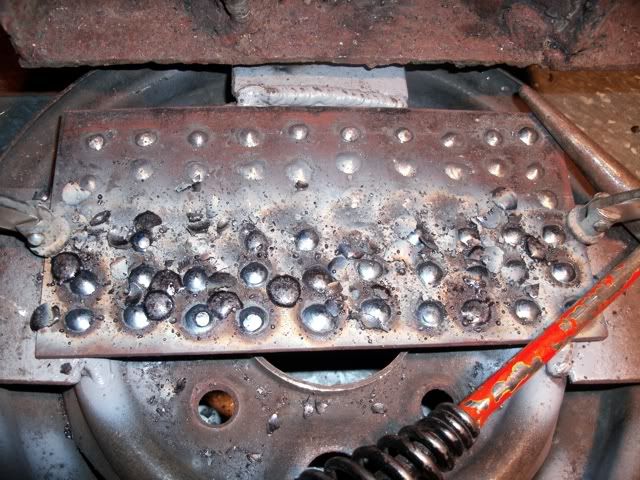
Here on this pic I started tapping each weld bead application very lightly with the chipping hammer and you can see whole slags dislodging from each bead, which means I have the correct amperage setting and the correct length of time in applying the welds.
CIGWELD Weldskill 250 amp Mig Welder
AHP Alpha-TIG 200X welder
HITRONIC 300 Amp DC Inverter IGBT Welder
YAMATO 300 amp AC Stick Welder
YAMATO 200 amp DC Inverter IGBT Welder
DeWALT Chopsaw
HOBART and ESAB Welding Helmets
cloned STIHLs
MS 044 chainsaw
MS 070 chainsaw


