


Re: STICK WELDING on thin sheet metal
I have continued my PIPs in welding this past two days and here are some pics of those exercises.
And I opted to doing again some 3 scrap sheet panels marked with A, B,C and D for easy identification and reference. Maybe this will be the last for the 0.95mm thickness sheet metal then I'll proceed to the 0.98mm C-Purlins again after which I'll start doing sheet metals above the 1.0mm thickness and then onwards.
On this exercises I intentionally made it a step by step process so we will easily know the progress being made, I just hope wala akong kulang na pics but I tried my best to weld, stop, then take pics of every finished weld passage.
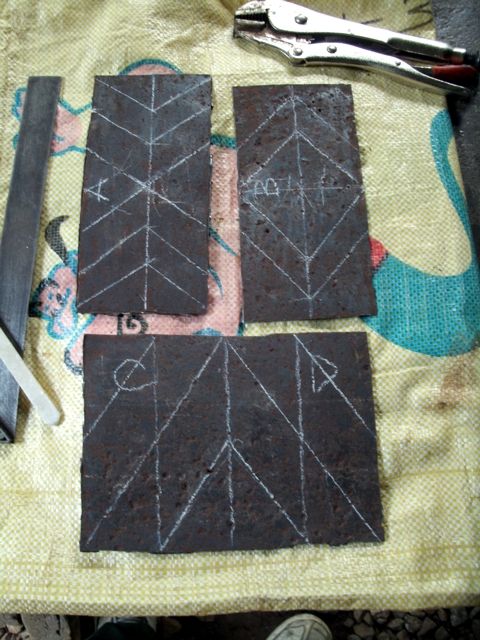
Here are the 3 scrap plates that I mentioned above and this will be my subject for welding exercises and are marked A, B, C and D. And of course I'll start with PLATE A.
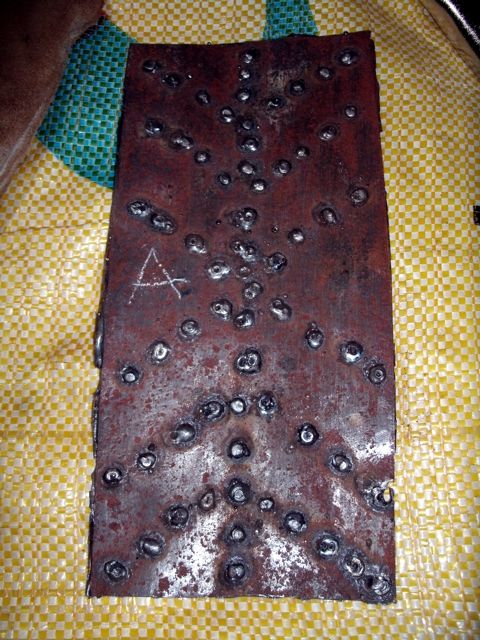
Again I went back to practicing bead welding and find out my hand pulse and control if it is improving and from the results that I see, I have made lots of improvement and success in delivering the beads. If we are talking of percentage here there are more nice and uniform weld beads done, well of course I'm so happy with the results and accomplishments.
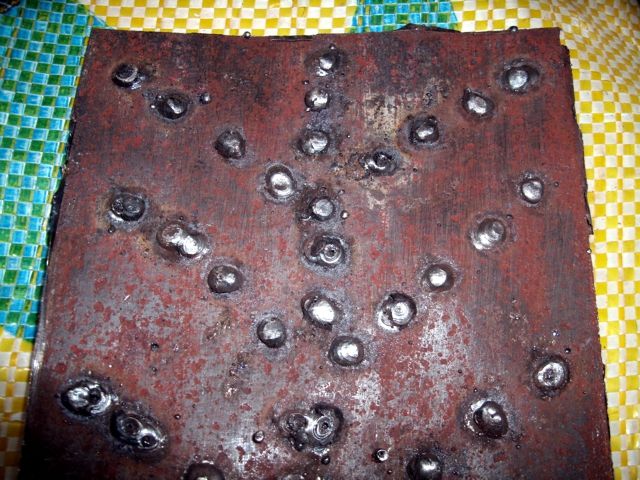
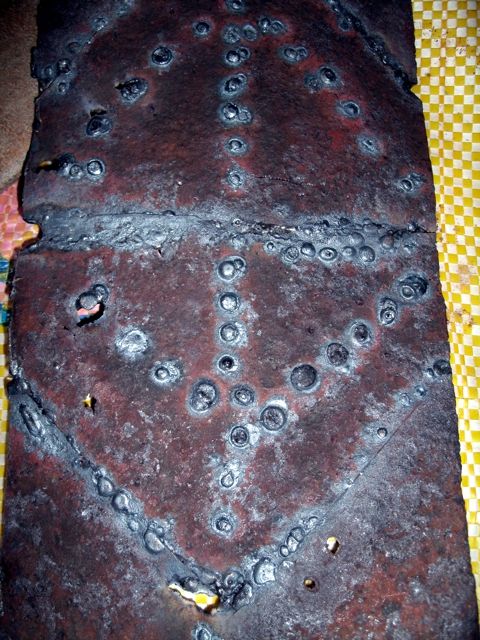
A close up of the upper portion of the plate and majority of the weld beads are uniformed and very satisfactory.

And here is the lower portion of the plate and as one can see, less punched holes, very minimal, more on nice beads deposited.
CIGWELD Weldskill 250 amp Mig Welder
AHP Alpha-TIG 200X welder
HITRONIC 300 Amp DC Inverter IGBT Welder
YAMATO 300 amp AC Stick Welder
YAMATO 200 amp DC Inverter IGBT Welder
DeWALT Chopsaw
HOBART and ESAB Welding Helmets
cloned STIHLs
MS 044 chainsaw
MS 070 chainsaw
Re: STICK WELDING on thin sheet metal
Now here is the second sheet or plate and also marked. This is Plate B.
On this plate I have sliced it into several sections so that I can practice putting them together this plate in one piece.
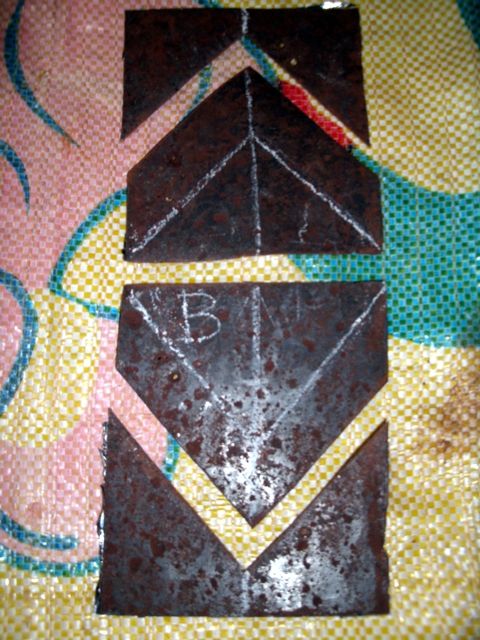
As you can see the plate has been divided into pieces to add more room for practice in putting the metal plate back.
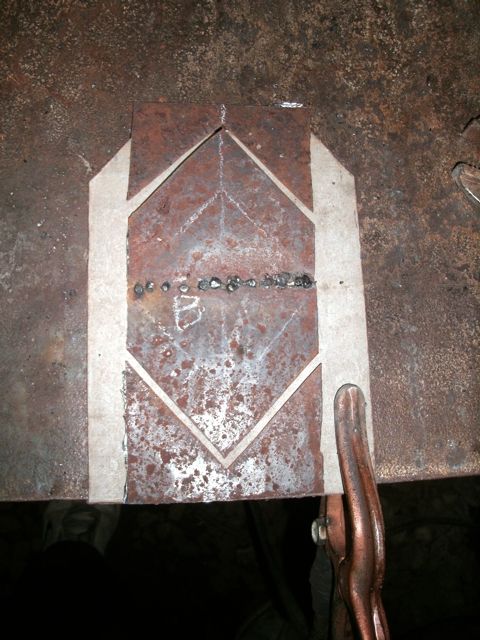
Here on the middle cut I deposited several bead welds to put the two sheets back together again.
A closer look of the metal plate tacked.

And this is how it looks from a little distance.
CIGWELD Weldskill 250 amp Mig Welder
AHP Alpha-TIG 200X welder
HITRONIC 300 Amp DC Inverter IGBT Welder
YAMATO 300 amp AC Stick Welder
YAMATO 200 amp DC Inverter IGBT Welder
DeWALT Chopsaw
HOBART and ESAB Welding Helmets
cloned STIHLs
MS 044 chainsaw
MS 070 chainsaw
Re: STICK WELDING on thin sheet metal
To continue with the PIPs :
After the initial bead welds on the middle cut of the plate, I started to apply some more beads in between the previous beads to start closing in the gaps and so on and so forth until all the gaps of the two metal sheet or plate are welded and fully covered.
And after this, I also proceeded in applying bead welds on the two other upper and lower parts of the plate. I started tacking them together.
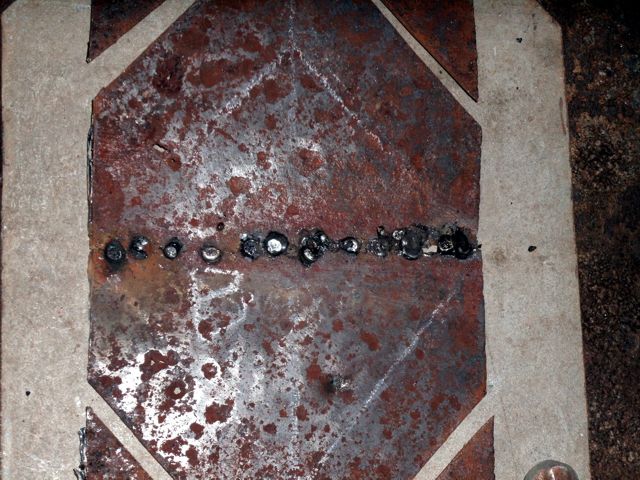
On this pic after tacking the upper and lower portions of the sheet plate , I went back to the middle portion and adder some more welds to make sure that the gaps are properly welded and covered. Then back to the upper and lower portions to apply again some more additional bead welds in between the first existing spot welds. HERE the process done in the middle will just be the same. 😉
There it is the upper and lower portions with the additional bead welds. Specially the lower portion where the sheets are being connected, I have added more weld beads in between previous beads applied covering all gaps in between the two sheets of metal.
CIGWELD Weldskill 250 amp Mig Welder
AHP Alpha-TIG 200X welder
HITRONIC 300 Amp DC Inverter IGBT Welder
YAMATO 300 amp AC Stick Welder
YAMATO 200 amp DC Inverter IGBT Welder
DeWALT Chopsaw
HOBART and ESAB Welding Helmets
cloned STIHLs
MS 044 chainsaw
MS 070 chainsaw
Re: STICK WELDING on thin sheet metal
To continue with the exercise:
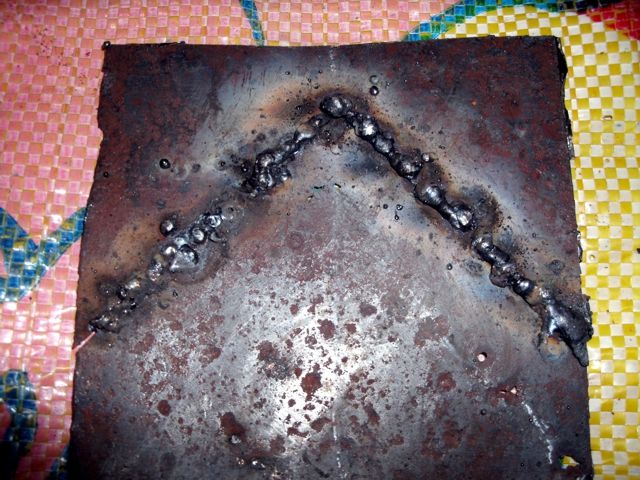
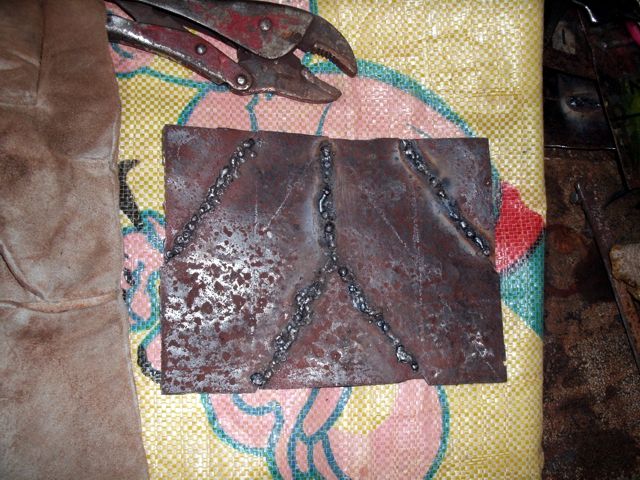
Here's a more closer look at the upper portion of the metal sheet that has been welded together.
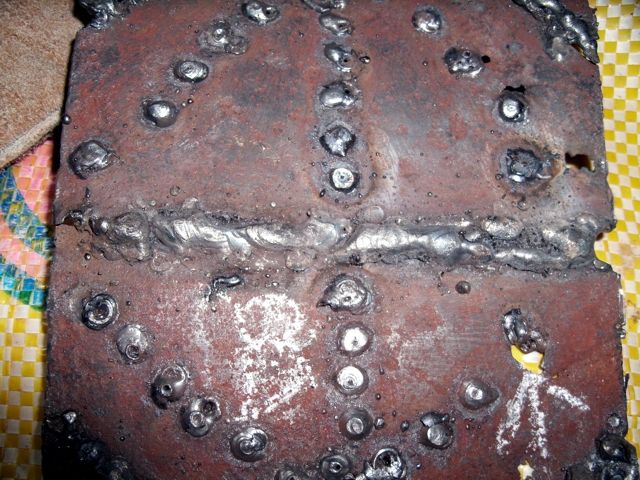
And another closer image showing the lower portion of the metal sheet. If you will notice a portion with an arrow showing a punched or burned hole but thats ok, that portion of the sheet metal is really very thin due to rust and I tried to rectify the welds but the whole just keeps on getting bigger so I stopped.
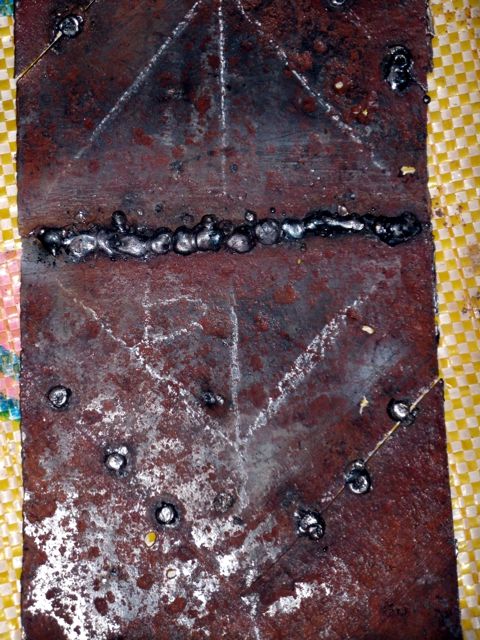
On this pic , after all the weld beads on the middle and lower part of the sheet metal plate has been filled up, I already applied a continues weld pass, as you can see the slugs are still in tack and have not yet been chipped of. If you noticed the weld pass went smoothly and not punching a whole on the sheet metal. Lots of improvements here, LOL
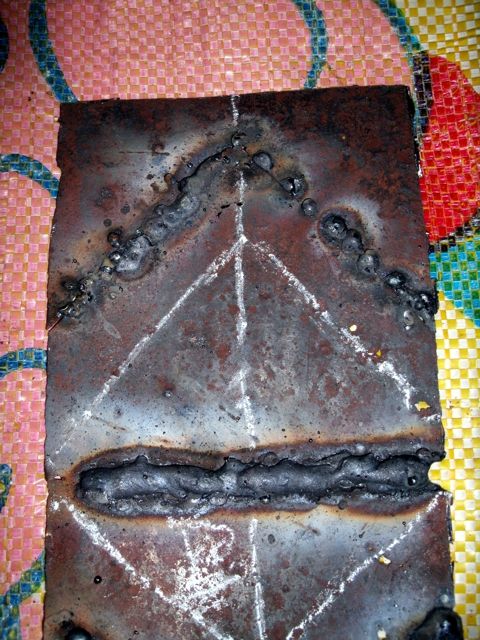
Here on this image, after the application of the continues weld pass on the lower and middle portion, I started again working on the upper portion to fill up with some more bead welds between the previous beads already applied and closing all possible gaps between the two sheet metal plates.
CIGWELD Weldskill 250 amp Mig Welder
AHP Alpha-TIG 200X welder
HITRONIC 300 Amp DC Inverter IGBT Welder
YAMATO 300 amp AC Stick Welder
YAMATO 200 amp DC Inverter IGBT Welder
DeWALT Chopsaw
HOBART and ESAB Welding Helmets
cloned STIHLs
MS 044 chainsaw
MS 070 chainsaw
Re: STICK WELDING on thin sheet metal
Again to continue with the exercise:
On this pic, on the upper right portion, I have completed the welds and will be working on the left side portion to again complete the deposit of welds to close and cover all gaps.
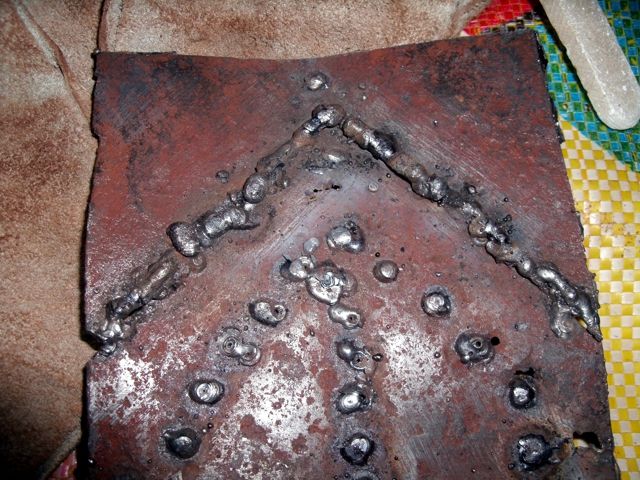
This image shows the left portion with the completed bead welds applied.
So sorry, I think I miss out one shot here (photo) showing the completed continues weld pass with the slugs un chipped., man!!, I missed this one stage.

In this image I think my tasks here is complete, thru all this exercises I have learned some techniques in the process and has become very useful. Mistakes has become so minimal and can be corrected in the future exercises.
Here is a closer look at the finished weld in the middle portion of the sheet metal plate.
WILL CONTINUE WITH THE SAME METAL PLATE :
In my next post I'll be showing the back side of the same plate and the front also, already grinded to see if there is really total fusion of the sheet metal plates.
After which Plate C and Plates D will be the next in line for the exercises.
THANK YOU FOR VIEWING AGAIN and hope we are all learning from this PIPs.
CIGWELD Weldskill 250 amp Mig Welder
AHP Alpha-TIG 200X welder
HITRONIC 300 Amp DC Inverter IGBT Welder
YAMATO 300 amp AC Stick Welder
YAMATO 200 amp DC Inverter IGBT Welder
DeWALT Chopsaw
HOBART and ESAB Welding Helmets
cloned STIHLs
MS 044 chainsaw
MS 070 chainsaw
Re: STICK WELDING on thin sheet metal
A continuation and last post for Plate B :
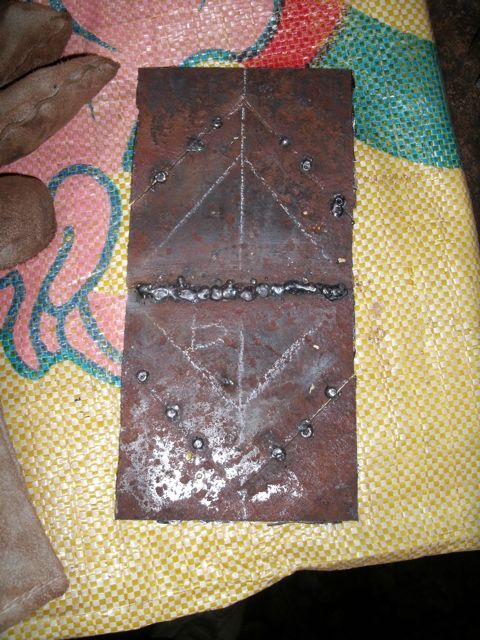
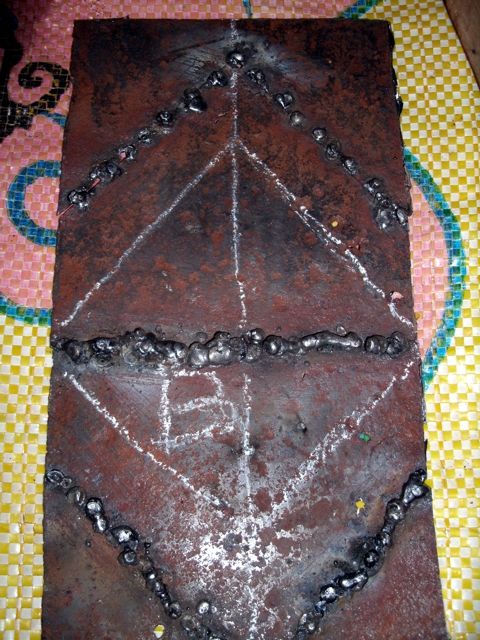
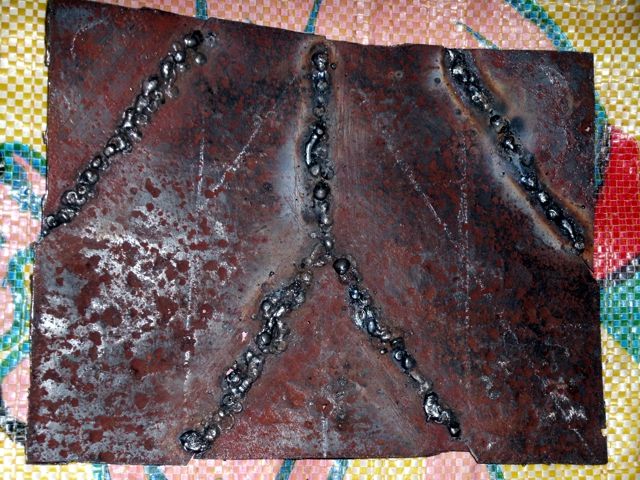
This is the finished practice plate as shown on the previous post.
In this image penetration of the welds are shown. Plus pag napa tagal ng welding rod na naka dikit sa plate when welding you're liable to burn or punch a hole on the plate, he he he he , parang over penetration ba !!!!! .
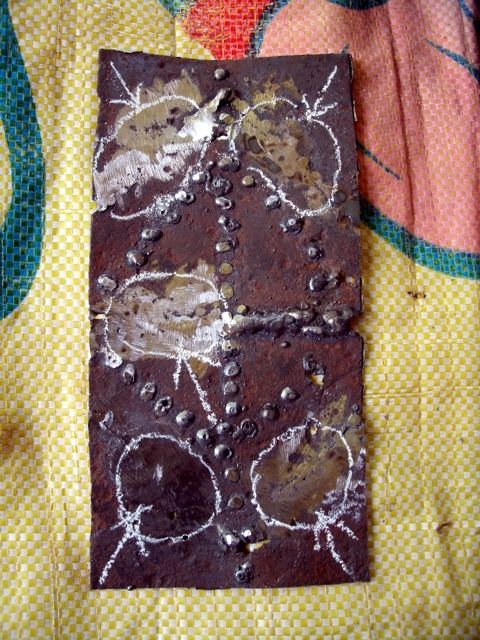
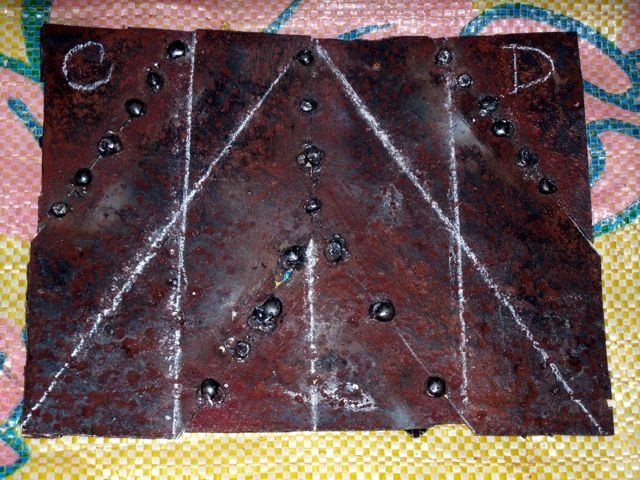
On this last pic, I'm showing the grinded front side of the finished practice plate. The parts encircled with white stone chalk are the one's that were welded and put together.
Thanks again for viewing this PIPs and next to be posted will be the practice plates C and D. :p
And hope its not getting to be boring or something, thanks for your patience again.
CIGWELD Weldskill 250 amp Mig Welder
AHP Alpha-TIG 200X welder
HITRONIC 300 Amp DC Inverter IGBT Welder
YAMATO 300 amp AC Stick Welder
YAMATO 200 amp DC Inverter IGBT Welder
DeWALT Chopsaw
HOBART and ESAB Welding Helmets
cloned STIHLs
MS 044 chainsaw
MS 070 chainsaw
Re: STICK WELDING on thin sheet metal
To continue practice welding on thin sheet metal,
This pic is just to remind viewers that I'll be doing my PIP on Plates C and D, the last sheet or plate at the bottom and this will be the last using a 0.95mm thickness sheet. Again I have made this a step by step process so that it can easily be understood but of course it would be much better if it is seen in actual welding demo compared to still photos.
Also doing this PIP welding doesn't provide glamorized pics, what happens to the applications of the weld beads is how it is ugly, dirty looking punch holes on the metal, not to mention the slugs it produce, the stains and rust of the metal every where, on your shirt, gloves or even your face plus the irritating fumes it releases that sometimes you have to hold your breath for a few seconds while welding so not to inhale that hazardous fumes. In welding or doing metal works, it is only appreciated when the project item is already finished with it beautiful welds that are sometimes evident in the metal joints and when it is already finished painted and viewed from all angles very much unlike in wood working when one appreciates already the beauty of the wood and its surface, then showing in details how every part will be joined, the mortise and tenons, the dovetail joineries, the sanding and dry fitting and every thing that goes with its construction. Well anyway enough for the comparison and just proceed with the PIP.
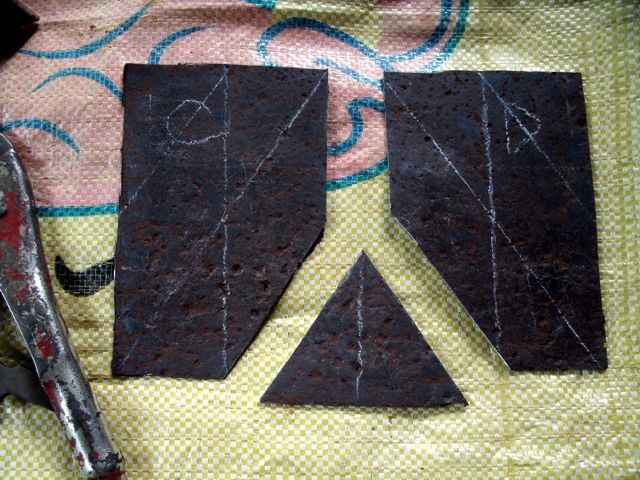
Cut the sheet to several pieces so that I have more sheets or joints to be welded together.
CIGWELD Weldskill 250 amp Mig Welder
AHP Alpha-TIG 200X welder
HITRONIC 300 Amp DC Inverter IGBT Welder
YAMATO 300 amp AC Stick Welder
YAMATO 200 amp DC Inverter IGBT Welder
DeWALT Chopsaw
HOBART and ESAB Welding Helmets
cloned STIHLs
MS 044 chainsaw
MS 070 chainsaw
Re: STICK WELDING on thin sheet metal
To continue with the PIP ( practice in progress ) :
Here I started applying bead welds ( tack welding ) on every piece to be joint.
Then on this pic, little by little and very patiently applying subsequent beads on each side of each piece to be welded.
A closer view of the plate.
A much clearer image of the welded plate. Then lightly grinded the beads that have been deposited on the metal.
CIGWELD Weldskill 250 amp Mig Welder
AHP Alpha-TIG 200X welder
HITRONIC 300 Amp DC Inverter IGBT Welder
YAMATO 300 amp AC Stick Welder
YAMATO 200 amp DC Inverter IGBT Welder
DeWALT Chopsaw
HOBART and ESAB Welding Helmets
cloned STIHLs
MS 044 chainsaw
MS 070 chainsaw
Re: STICK WELDING on thin sheet metal
To continue with the PIP :
After lightly grinding the beads, I started applying welds on the joints continuosly resulting into two punch holes, but that's ok.

A closer look at the metal sheet with two punch holes.
A much more closer look at the metal sheet, Actually with three punch holes.
Here is a closer view of the metal plate with nice satisfactory weld deposits
CIGWELD Weldskill 250 amp Mig Welder
AHP Alpha-TIG 200X welder
HITRONIC 300 Amp DC Inverter IGBT Welder
YAMATO 300 amp AC Stick Welder
YAMATO 200 amp DC Inverter IGBT Welder
DeWALT Chopsaw
HOBART and ESAB Welding Helmets
cloned STIHLs
MS 044 chainsaw
MS 070 chainsaw
Re: STICK WELDING on thin sheet metal
Again to continue with the PIP :
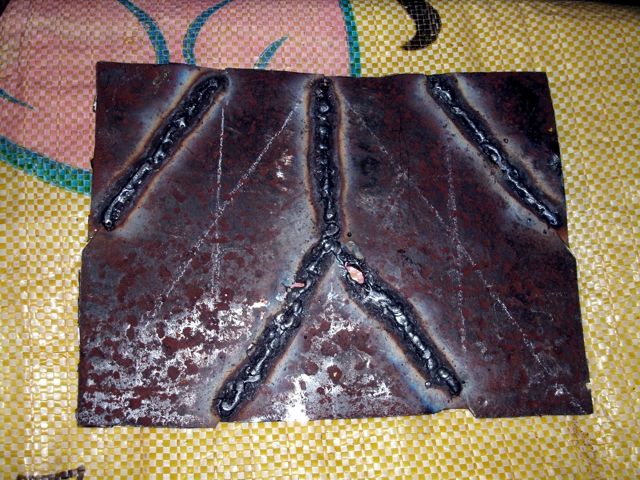
On this last postings, I toyed around with the applications of the welds on some metal joints,plus a step by step again on how the welds were applied.
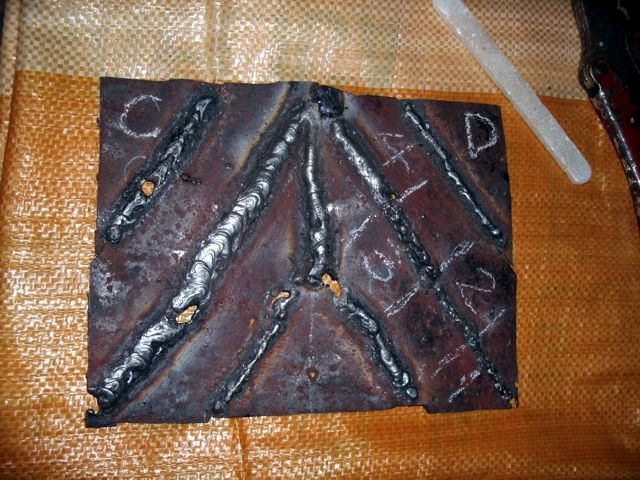
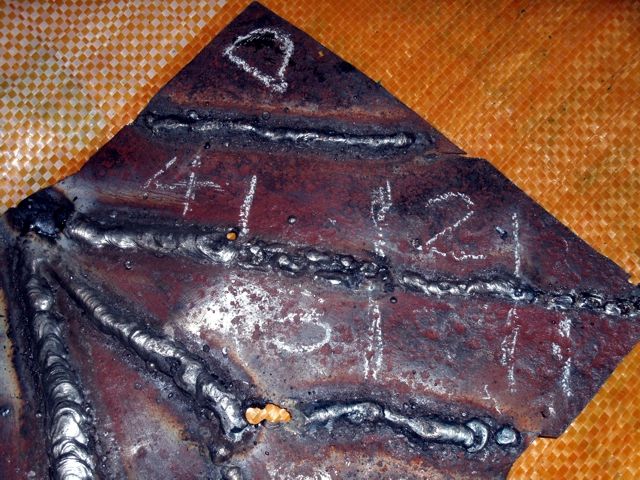
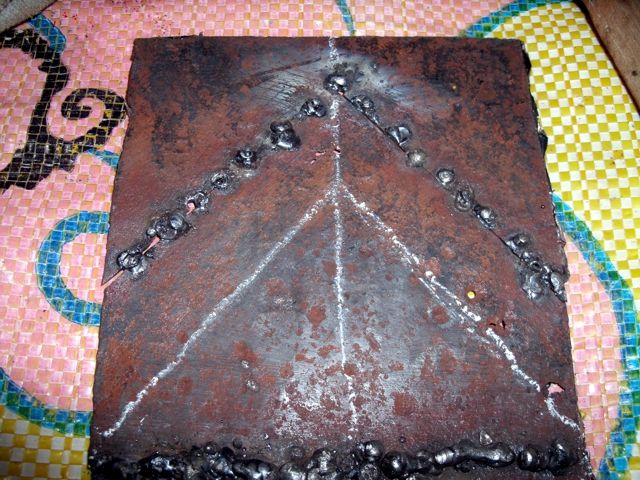
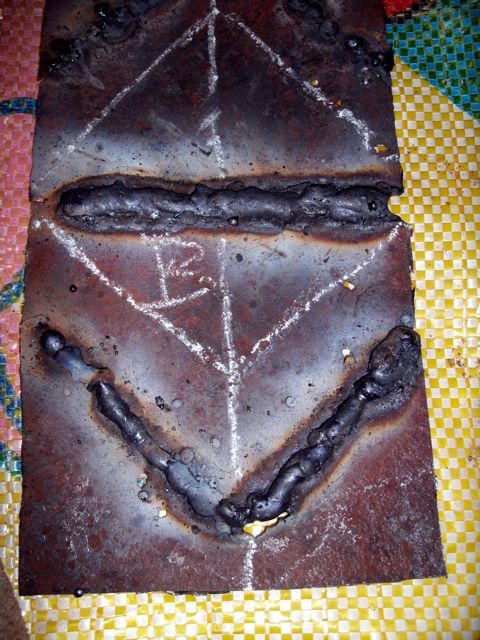
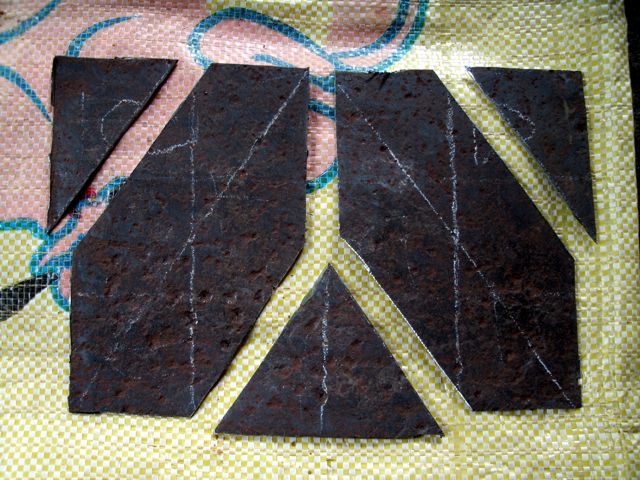
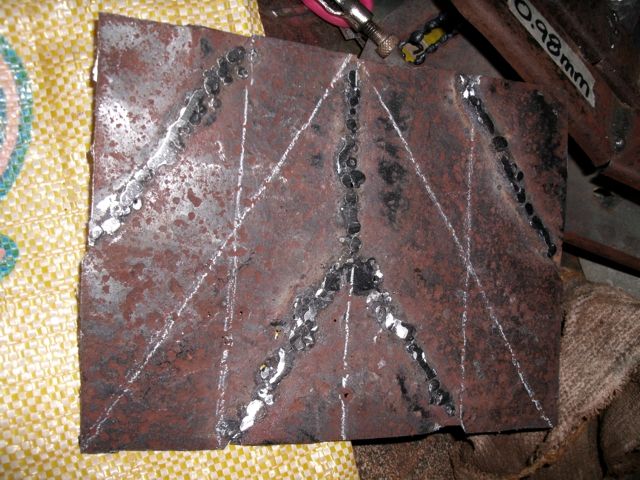
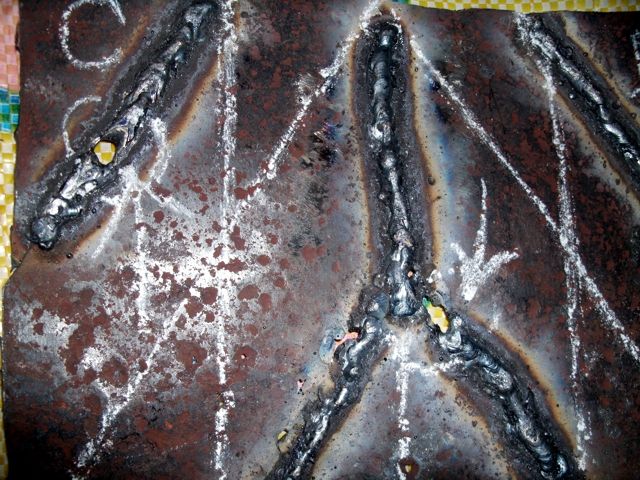
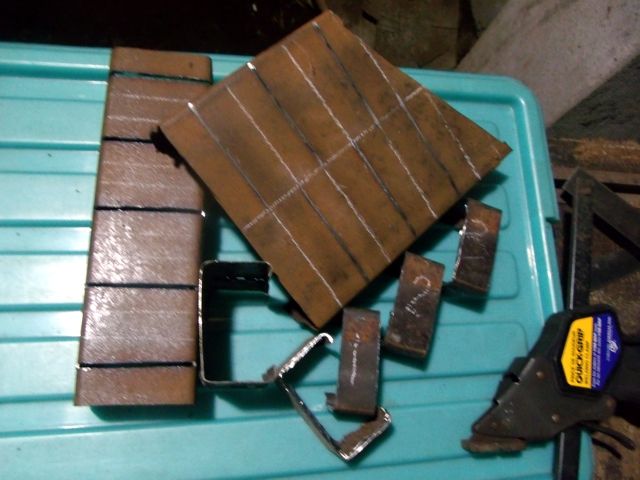
Showing on these two images, on the side of plate D, you can see a welded part marked with white chalk and some sort of divided segmented portions showing each weld pass. The first pass is the # 1, I applied bead welds on the entire line indicate or shown in the metal surface., then again applied a second pass over the first bead welds, that's # 2, its as if I am building up the metal surface., then on the # 3 segment, I did made another weld pass over the entire # 2 segment to thicken the surface where I will apply the final full weld., and then on the # 4 segment is my final application over the #3 weld pass, it is now a full weld.
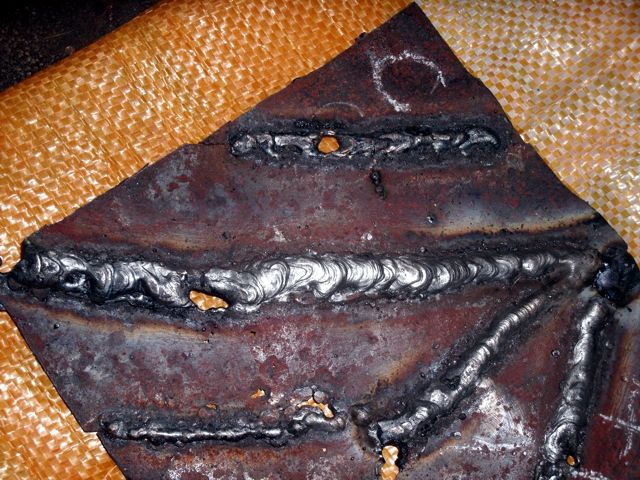
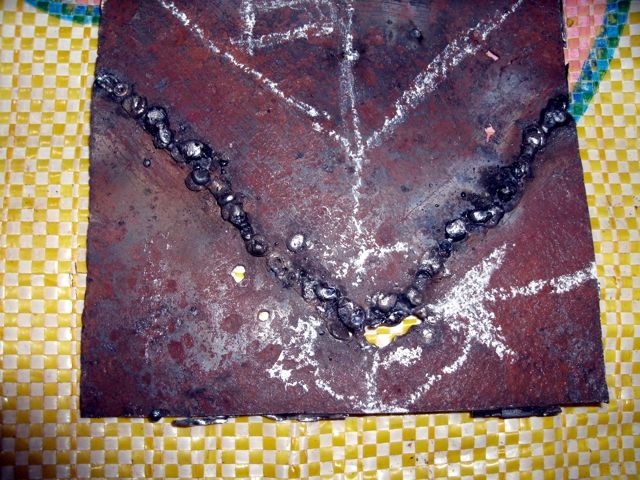
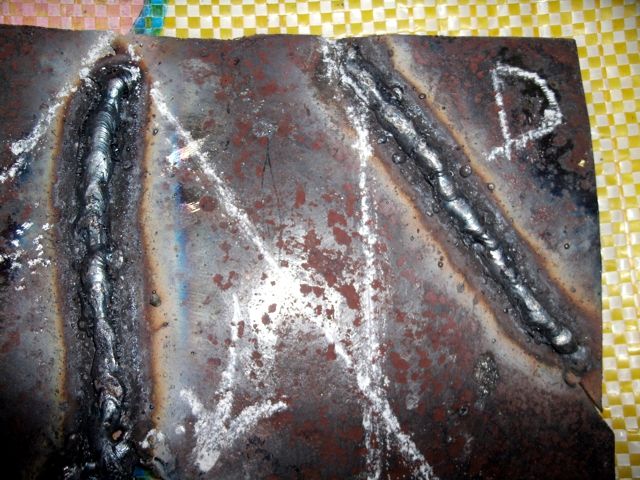
Here I'm showing some full weld applications on plate C, though a punch hole was again made maybe due to the metal that has become to thin due to rust but still very negligeble and still can be corrected on new sheet metals.
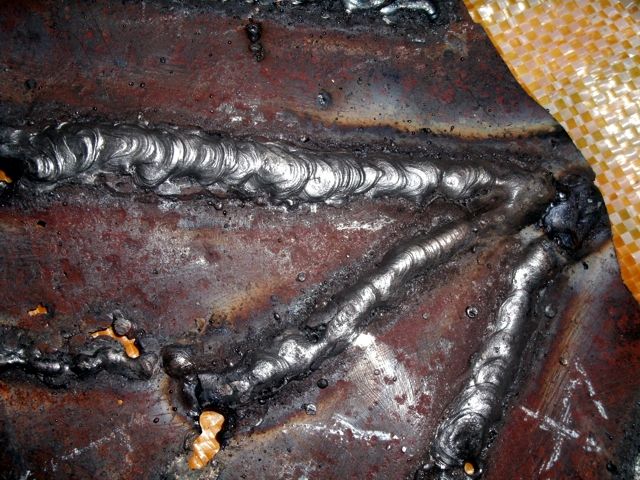
On this last pic, I am showing full weld applications on a thin sheet metal and who says applying full weld on thin sheet metal is not possible using a stick welder ? There it is guys, I just did it, its just a matter of learning the right technique and patiently practicing on it.
Ok that finishes off my PIP on this 0.95mm thick sheet metal. Next will be again on C-Purlins with 0.98mm thickness and will be applying what I have manage to develop some technique in applying welds on thin sheet metals.
Thanks again for patiently viewing this PIPs.
CIGWELD Weldskill 250 amp Mig Welder
AHP Alpha-TIG 200X welder
HITRONIC 300 Amp DC Inverter IGBT Welder
YAMATO 300 amp AC Stick Welder
YAMATO 200 amp DC Inverter IGBT Welder
DeWALT Chopsaw
HOBART and ESAB Welding Helmets
cloned STIHLs
MS 044 chainsaw
MS 070 chainsaw
Re: STICK WELDING on thin sheet metal
The following exercises now will be on C-Purlins again with 0.98mm thickness and I guess that is about gauge 20 or so. On this C-Purlins I'll be using the same technique that I was able to learn or manage to develop through the course of practicing on the thin sheet metal. This practice/exercise will again be a step by step process so that possible viewers would understand how the welds were applied on the subject.
This pic is just to remind the viewers that these are the C-Purlins that I will be practicing on., the longer one which is a 2 x 4 inch, 0.98mm thick and the larger one which is a 2 x 6 inch, 1.25mm thick, the smaller pieces, well I've practiced on it and are already been posted.

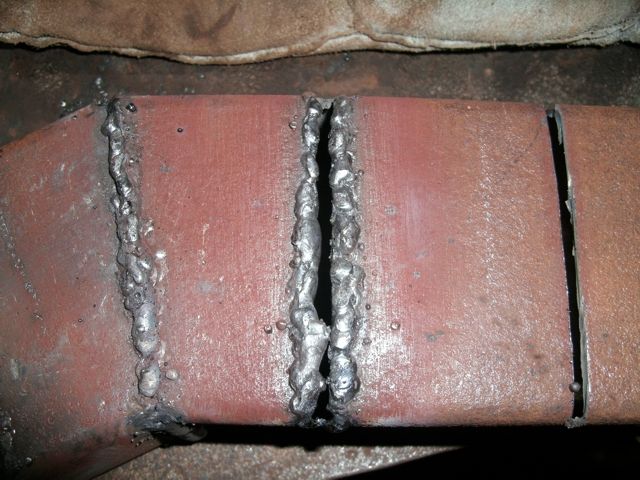
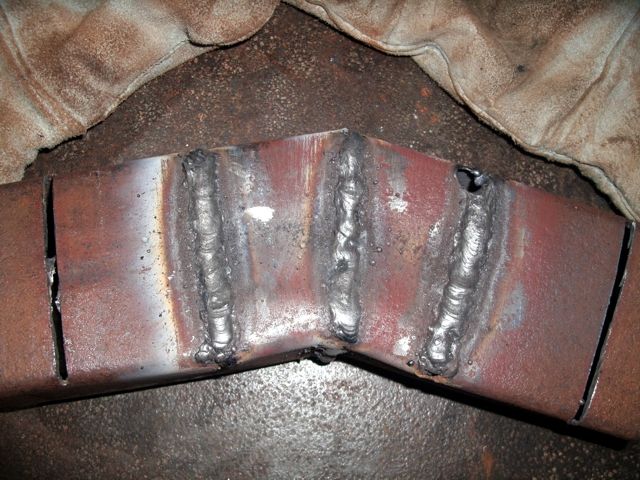
This is the longer C-Purlins, 2 X 4 inch, made some cuts on the surface inches apart and in the middle I made an angle cut up to the bottom so that I can fold it and have a joint that I can weld. Gave it a tack on the lower part of the cut so they would stay attached.
On this image, I have welded the middle cut and then proceeded to apply several bead welds on the sides of the cut. By the way, the kerf size is almost 3/16 of an inch, the thickness of a cutting disk. Purpose of several bead applications on each side was to thicken the metal and let the bead weld get closer to each other and that is the time I start welding and closing the gap of the metal.
On this pic I am showing the gap on the metal surface had been covered by welds. The other cut at the side of the C-Pulins I will leave for later demo.
CIGWELD Weldskill 250 amp Mig Welder
AHP Alpha-TIG 200X welder
HITRONIC 300 Amp DC Inverter IGBT Welder
YAMATO 300 amp AC Stick Welder
YAMATO 200 amp DC Inverter IGBT Welder
DeWALT Chopsaw
HOBART and ESAB Welding Helmets
cloned STIHLs
MS 044 chainsaw
MS 070 chainsaw
Re: STICK WELDING on thin sheet metal
To continue with the C-Purlins exercises :
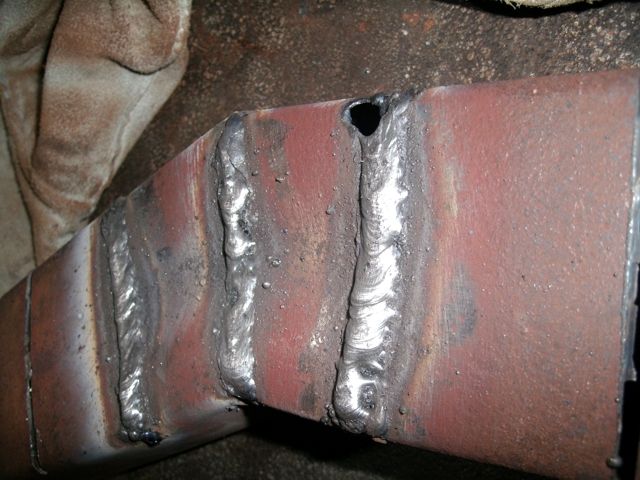
Now on the other side of the C-Puplins, I started to apply continues bead application on both sides of the cut, now this is my first pass.
And on this pic, I continued applying longer bead welds over the first pass so little by little I am closing the gaps of the metal surface. Try to look at it very carefully and compare the spacings of the gap.
Again on this pic, I once more applied another continues weld pass over the second pass making the gaps closer and smaller. If you will notice the space of each side is getting narrower and already possible to apply a continues weld to totally close and cover the gap.
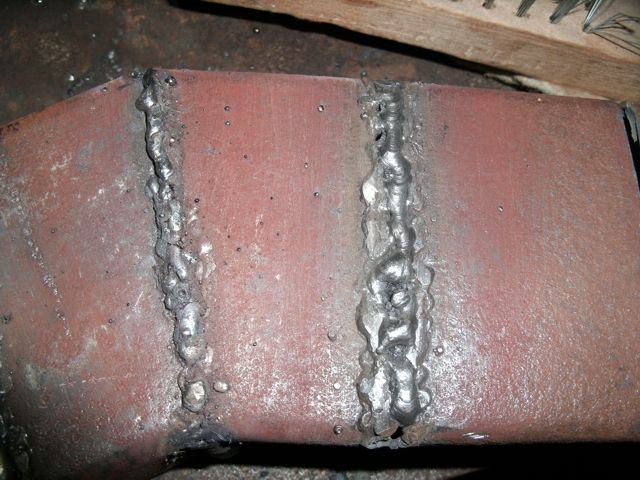
There it is, I have welded the gap and covered the narrow space between each side.
Next step is grinding each weld before applying the final full weld on the surface of the metal.
CIGWELD Weldskill 250 amp Mig Welder
AHP Alpha-TIG 200X welder
HITRONIC 300 Amp DC Inverter IGBT Welder
YAMATO 300 amp AC Stick Welder
YAMATO 200 amp DC Inverter IGBT Welder
DeWALT Chopsaw
HOBART and ESAB Welding Helmets
cloned STIHLs
MS 044 chainsaw
MS 070 chainsaw
Re: STICK WELDING on thin sheet metal
To continue the C-Purlins exercises :
OH another reminder, after each weld bead application I made sure that I have completely chipped off or removed the slugs above the metal that have been deposited on the metal surface. :samurai:
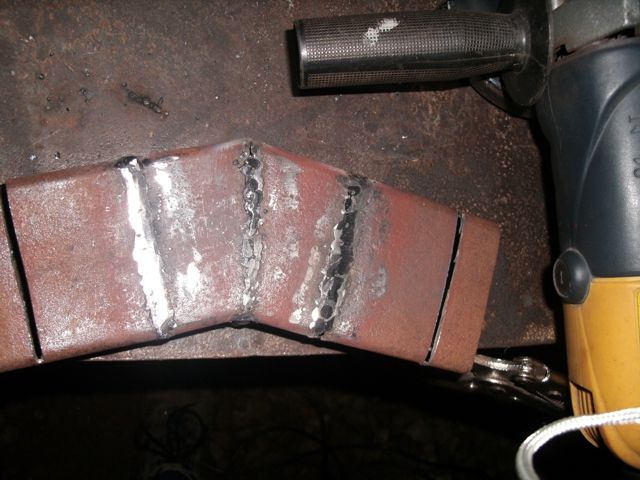
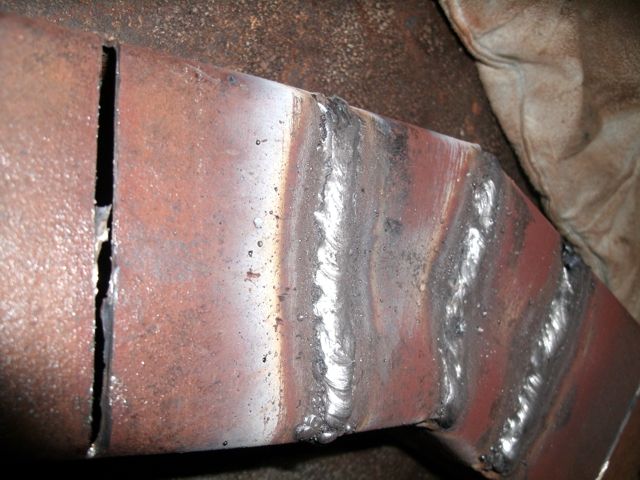
On this pic, I started to do some grinding on the welds to even out the surface and for a better final full weld applications.
There it is, the welds have been lightly grinded, using of course an angle grinder.
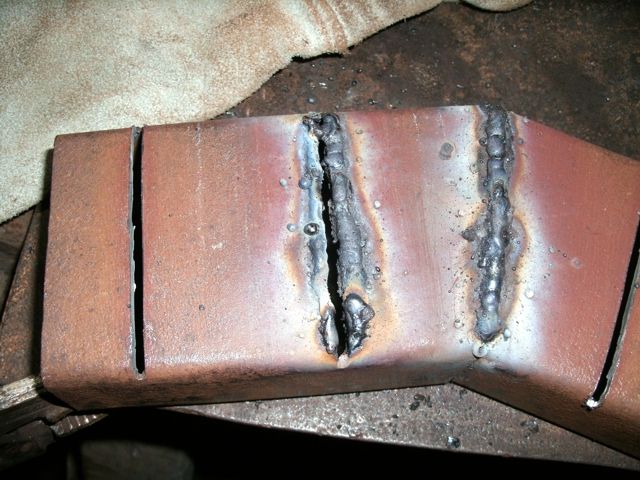
On this image, I have applied a full weld on each supposedly metal gaps though I have accidentally punched a hole in one end of the weld pass though there was no build up of welds on that end part of the gap.
If you will notice, I have not touched the two cuts at the end of the C-Purlins, I will show that later.
CIGWELD Weldskill 250 amp Mig Welder
AHP Alpha-TIG 200X welder
HITRONIC 300 Amp DC Inverter IGBT Welder
YAMATO 300 amp AC Stick Welder
YAMATO 200 amp DC Inverter IGBT Welder
DeWALT Chopsaw
HOBART and ESAB Welding Helmets
cloned STIHLs
MS 044 chainsaw
MS 070 chainsaw
Re: STICK WELDING on thin sheet metal
To continue with the C-Purlins exercise :
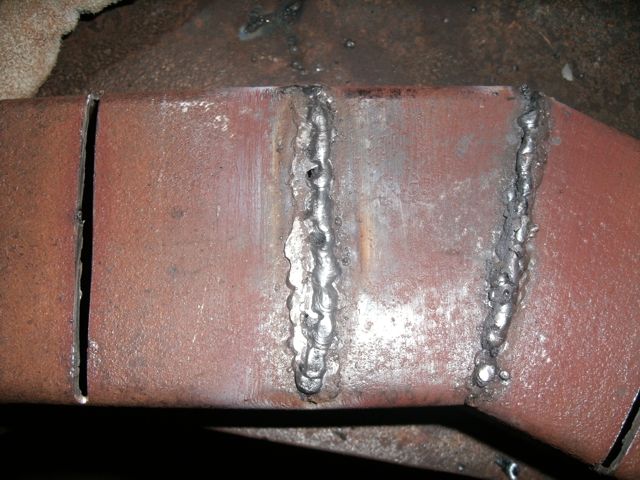
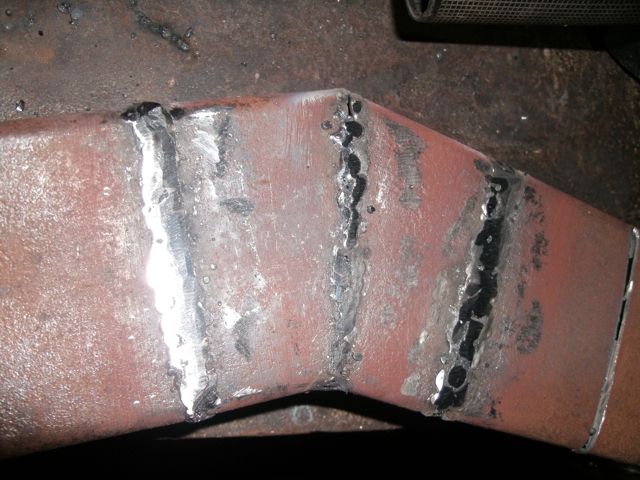
Here is the right side of the C-Purlins showing the full welds made. Of course plus the punched hole on the top end of the weld.
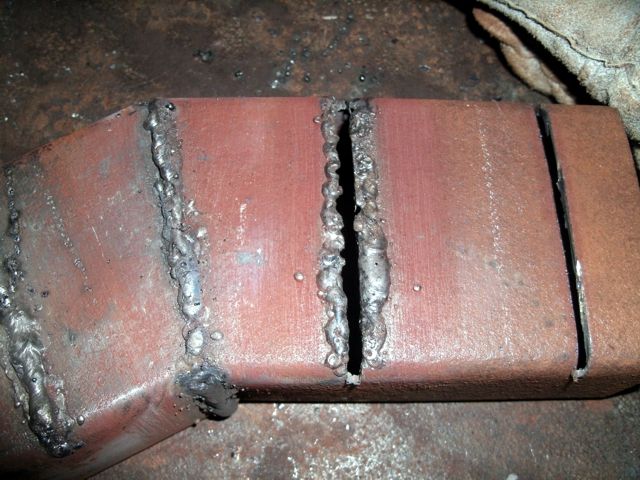
And then the left side showing again the full welds.
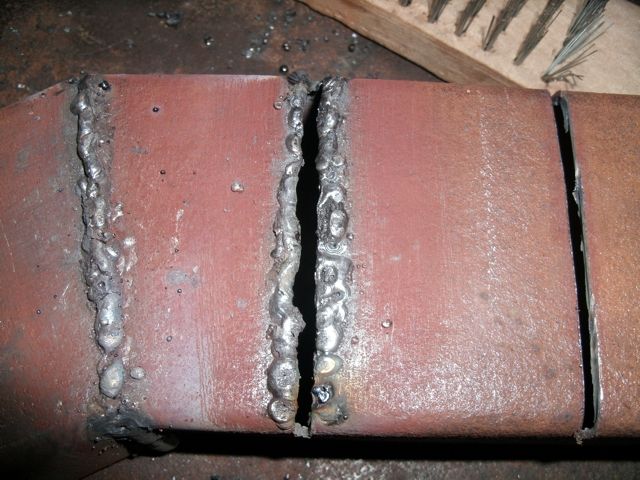
Now on these last two images I'll be showing the far end cuts on left and right on how it will appear when one directly stick a welding rod to the gap without any ahh shall we say some preparations or build up of the metal surface.
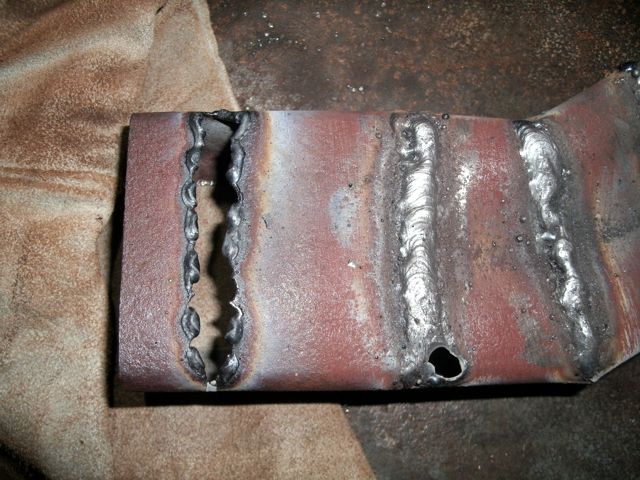

These two pics shows the burnt metal after directly sticking the welding rod to the metal surface and attempting to immediately connect the two sides of the gap.
Thanks again for viewing.
CIGWELD Weldskill 250 amp Mig Welder
AHP Alpha-TIG 200X welder
HITRONIC 300 Amp DC Inverter IGBT Welder
YAMATO 300 amp AC Stick Welder
YAMATO 200 amp DC Inverter IGBT Welder
DeWALT Chopsaw
HOBART and ESAB Welding Helmets
cloned STIHLs
MS 044 chainsaw
MS 070 chainsaw

Re: STICK WELDING on thin sheet metal
Nice bro ....
I can't estimate from the pics how wide the gaps are but usually for me I try to lay a flux stripped welding rod ( or wire ) in the gap prior to welding. This will somehow bridge the gap.
Millermatic 180 Autoset Mig Welder
Miller Spoolmate 100 Spool Gun
Victor Firepower 350 Oxy Ace Outfit
3M Speedglas 9002X AD Helmet
Makita LC1230 Dry Cut Saw
Ingersoll Rand Air Tools
Snap On Tools
Metabo Power Tools
Norseman Drill Cutting Tools
Bosch Power Tools
3M PPS


