


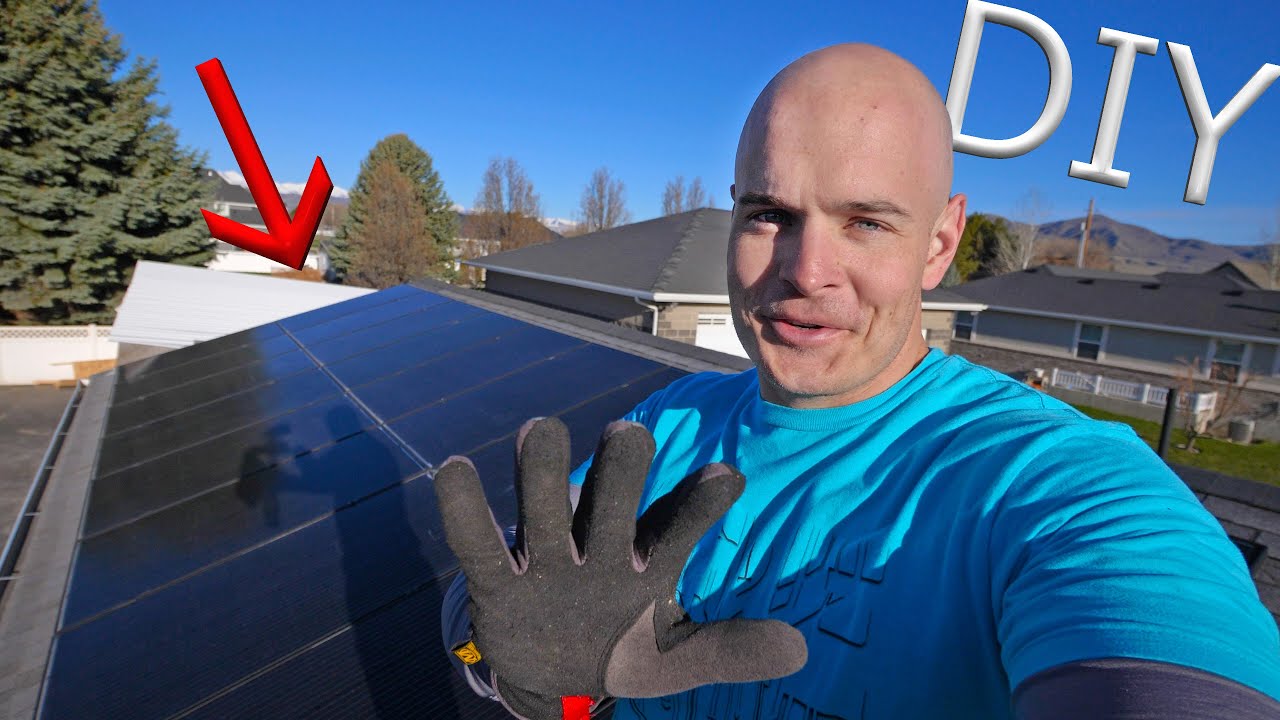
Jerry Rig Everything discusses how he installed a Do it Yourself Solar Power System For his home. Follow his step-by-step installation of an 8.06 kW solar power system on his roof.
ICON_PLACEHOLDEREstimated reading time: 16 minutes
Many people think that solar panels are pretty fragile, but that’s not the case. I’m currently walking on top of some, and I weigh about 200 pounds. Now, this is not something you want to do regularly – they are made of glass. But still, it can’t be a Jerry Rig Everything video without a durability test.
Jerry Rig Headquarters is currently powered by 100% renewable solar energy. And in Today’s video, I’m going to show you how I installed these. There are many places to buy solar panels, but I found that I could do it myself for about half the price.
I’ve partnered up with a company called Solar Wholesale that sells DIY kits that include everything you need in one convenient package. This includes the custom installation plans that you need for your permits from your city.
Also, keep in mind that these solar panels will retain 80% of their energy-producing ability for the next 30 years. Additionally, they then continue producing electricity for longer than that. And even though I went into this project knowing that I was going to install solar myself, I did price out other options. And it turns out Tesla was one of the more fairly priced out there. So if you don’t want to install solar yourself, Tesla’s a good option.
Alright, there is a lot of information to go over and not a lot of time to do it. So let’s get started.
Do it Yourself Solar Power System: The Process
The biggest perk of working with Solar Wholesale is this plan set. The plan set is the instruction booklet designed specifically for my house. Plus with all the information I need to get the permits and approvals from my city. Along with the plan set, they ship every single part that I need to install my solar system in one big kit. This makes the whole project much easier since the parts work together right out of the box.
Plus, the solar panels are made right here in the United States. Getting someone like Tesla to install solar for you is still worth it. Of course, it just takes a few more years to break even. But either way, you’re still making a positive impact on the environment. And lowering your electricity bill from the moment the panels get connected.
Remember, every house will have a slightly different roofline and different energy needs. This is why it’s nice to have this plan set that was custom made to my specific situation. This is the wiring diagram. All of this makes a lot more sense when you have the parts right in front of you.
So last time I was climbing up onto my roof, I broke my wrist, so there’s that. So we’ve laid out where the panels’ perimeter will be on the roof with a lumber crayon and a chalk line. This will help us visualize where the panels will be and where we’re going to lay the rack that the panels rest on top of. It will all start making sense in a minute.
Do it Yourself Solar Power System: The Racking System
To attach the racking system to the roof, we need to find the trusses underneath the shingles and the plywood. The easiest way to do that is with a hammer. Listen closely. You can hear the difference between the loose area of the roof and the solid area of the roof. And that’s where we want to drill down and attach our lag bolts.
We can tell by the resistance that the drill bit had all the way down through the wood that we hit a stud. We hit something good to tie into. So once you’ve found your first truss, all of the rest will be in the same spots. And if you’re working by yourself, you can attach the tape to the drill bit that’s still in the stud and mark two feet on center all the way down the roof.
Before we can attach the rails that hold the panels, we have to put the flashing down. I’ll explain what the flashing does in a second. Before I can put the flashing down, I have to put some of this clear sealant in a U shape around the hole that the lag bolt goes through. Then I’m also going to put some clear sealant into the hole because the whole point is to keep water out of the roof.
Then I can lift some of the shingles, slide the flashing underneath. And then this is the part that holds the rail. Put the lag bolt through the opening into the holes we pre-drilled earlier. Then we’ll ratchet it down into place.
Now that the flashing’s in place, we can visually see how it keeps water out of the roof. You know, the water will run down the roof, and it won’t go into the holes we just drilled, especially if you missed a hole and had to drill an extra one. Each of these bolts right here has a black washer around the top, which helps seal to keep the water out.
I decided to go with the snap and rack system because these little feet right here are adjustable up and down. So the rail can adjust underneath the panels to keep the panels level. It’s called a snap and lock system because the rail will sit right on top of these little feet and click into place. Just like, you know, a little Lego.
The rail itself is black, making it a little more aesthetic on top of the roof. It can slide forward and backward inside the channel as we’re positioning it. And there’s a channel inside of the rail that hides the wires for all of the micro-inverters.
Do it Yourself Solar Power System: Micro-Inverters
So the rails are up, and it’s micro-inverter time. So the micro-inverters are held in place with these little metal pieces, which can dip into the rail and then clip up into place. We decided to go with micro-inverters over other inverters because they’re easy to install, and two, they are much safer. They convert the power from DC to AC right at the panel. And if one panel does get covered by, like, let’s say, snow or shadow from a tree, the rest of the panels keep working, which isn’t always true of other types of inverters.
All of our solar panels are on the roof. There has to be a way to get the roof’s power into the house. We do that with something called a roof junction box. We have to drill a small hole in the roof, and normally this would be where you have attic space. But in this particular building, we do not. So we’re going to drill a bigger hole, fish the wire through the wall, and pull it up through the top. The bigger hole is still fine, though, because of the roof junction box. Once we seal it up with that clear sealant– will make sure no water runs inside.
The shingles will just fit down over the flashing, and no water will get into the attic space. So the cable that connects all the micro-inverters is called a trunk cable. This is what brings the power from the micro-inverters down to the roof junction box. So the trunk cables lay down inside of the rail. We’ve put some electrical tape over the connection, and then we zip tie the whole thing to keep it secure.
Remember, every house will be slightly different, but this is the exterior roof junction box. And we have the yellow wire running through inside the attic space. All of these wires were provided in my kit. But we need a switch from the yellow insulated wire, indoor wire, to the exterior wire when running it through the conduit.
This gray stuff down along the side of the house. This junction box will start feeding the exterior wire down through there and then into the breaker panel. So since these trunk cables are generic, they are probably not cut to a length just yet. We’re just going to chop it where we need it and remove the extra plugs. Then we can take these two trunk cables inside of this junction box and connect them to the insulated yellow wires down to our exterior junction box on the wall.
Do it Yourself Solar Power System: Laying Down the Solar Panels
So we’re just about to start laying panels. Because of how many panels are on this roof, I have to have two arrays. This means that two trunk cables are coming into this junction box. You might be wondering what we’ve done down here on this section of the roof. It’s because we can fit more panels if we run them horizontally. So we’ve laid the rails out in a different way. And that shows that no matter what your roof looks like, we can always orient the panels to most utilize the space.
So this copper wire right here is called a system ground. It’s tied into each one of these rails with little spikes and clips. So if any electrical anomalies like faulting or lightning happen, it’ll just transfer the electricity right into the ground heading down to the junction box.
So let’s talk about setting the solar panels and wire management for a second. Right now, we have three panels in place and a 4th one right here, ready to snap-in. Each solar panel has two wires on the back that plug into the micro-inverter. The micro-inverter can hold four panels at a time. It runs down the trunk cable all the way down to the roof junction box down there at the end.
The DC wires are at one end of the panel. We’re running the wire down those center lines to plug into the micro-inverters easily we have placed on the rail. Remember that none of these wires can be touching the roof. Thus, there are little eyelets at the bottom that we can zip tie the wires to. We can also twist them together a little bit. This will ensure that nothing is touching the shingles before we plug them in.
So this little guy right here is called a mid-clamp. This is what clips into the rail and holds a panel on either side. There’s a myth going around that solar panels aren’t very green because of how much energy it takes to produce them in the first place. And that’s also not necessarily true. Depending on where the solar panels are manufactured, it takes anywhere from 6 months to three years for a solar panel to off-set the carbon it took to make it in the first place. Which isn’t very much time considering how long its lifespan is.
Another perk of the panels that came in my Solar Wholesale kit is black on black. There are no silver frames. It’s something to think about when you’re picking out panels. I got the black ones, so they blend into the roof a bit more. Another perk of having the micro-inverters is that the system is totally modular. We can add panels or take away panels as much as we want. Also, we don’t have to worry about the junction box or limiting our system to a certain size when we set it up the first time. It can always be expanded.
The nice thing about the snap and rack system is that every fastener on this project is either a Phillips head screw or a half-inch sprocket. This makes the installation pretty quick because you’re not looking for all kinds of tools.
Now we have our solar panels installed, we left our rails a bit long to give ourselves a bit of leeway. Now we can just cut them off. So these end clamps basically slide into the channel. Then when we tighten this bolt right here at the end. It snugs it up tight and holds the panel in place. Then these plastic end caps snap on to keep everything looking aesthetic from the ground.
Do it Yourself Solar Power System: Powering it All Up
Alright, so let me tell you what’s going on electrically here for a second. We actually haven’t connected the wires yet. This is the panel that’s powering the house we’re in right now, and we’ve drilled a hole through the panel to the outside. And then these two boxes out there that we just installed are going to take power from the solar panels on the roof, bring them into this box, combine all the panels, and then head over here to the solar disconnect, which can actually disconnect all of the power from the solar panels heading into the house. It’s a safety thing.
When working with the wires and the electrical part of the solar system, remember to one, follow local code, and b, follow your plans. It’ll explain everything you need to know.
So we have the larger array up here, the smaller array down here at the bottom, and they are all connected in this joiner box in the center. All the wires from the roof and this side panel over here feed into this, and you can see these ground wires, these copper wires attached to the rails, and all of those heading down to the breaker box, which I’ll show you in a second.
Now we can tuck all these wires inside the box and close it up. Here in the breaker box, this is what’s accepting the two strings that I have. Each of the strings has its own 20 amp breaker. Black and red go on the bottom, and the ground goes over here on the side.
Remember, there are two kinds of solar systems. There are grid-tied and off-grid. We installed a grid-tied system here, which means that the solar panels need to sense the grid before supplying power to my house. If those micro-inverters up top don’t sense power from the grid, they will stay off. So I can touch these wires all I want because we’re not attached to the grid yet. If you want an off-grid system, you need to install a few other components, and maybe I’ll make a video about that later, but this is all about grid-tied.
If you want to use your solar panels when the city power goes out, you need a battery or a generator. It’s pretty cool that all of that solar panels just come down into these 6 wires. It makes it pretty simple. And now we’re going to connect that breaker panel to the solar disconnect with this thicker gauge wire, and it should just go through the hole, and we can wire it up.
Now, we’re going to take the same thickness of the wire and push it through to the breaker panel on the other side of the wall. So this is still not connected inside of the house. So no power is running to it from the panels up top or from the grid. Basically, this safety shutoffs called a knife blade switch. So right now, it’s connected, and watch these metal bars right here. When I turn it off, the metal bars knife away and break the connection.
And remember, since this is a grid-tied system, once those micro-inverters up top stop sensing the power, they turn off, and there’s no power running anywhere in the solar system. So up to this point, we haven’t been working with any live wires. This is the part where we start working in a place where there could be power. Now, we have shut off power to this particular panel, but if you’re feeling a little uneasy about working next to live power, you know, the grid, you can always hire someone to do this particular portion for you.
If you remember, these three wires are coming in from that safety shutoff from outside. And we have an empty slot in the breaker panel where we’re just going to connect these wires, one into the ground and the other two into the breaker, which connects the solar on my house to the grid. And now my solar wires are connected to the breaker box, and the system is on.
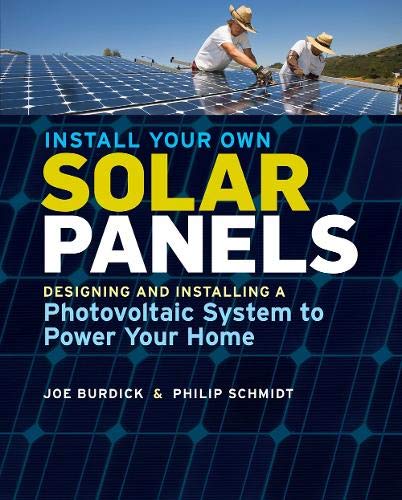
Labor and related costs account for more than half of the price of the average home solar installation. But homeowners can save thousands of dollars with this user-friendly manual, which follows the same process professional contractors use. Through detailed directions and step-by-step photos, veteran solar installer Joseph Burdick and seasoned builder Philip Schmidt teach you how to determine the size, placement, and type of installation you’ll need. This comprehensive DIY guide covers everything from assembling rooftop racking or building a ground-mount structure to setting up the electrical connections and making a battery bank for off-grid systems.
So we powered everything on, and it’s connected and working, but I still need to get my final inspection and have my meter changed out so it’ll read power going both directions. That whole process will take me about a week or two, but that time has already passed for you guys. My meter is installed, and we are pumping out green energy. The energy that I don’t use during the day flows out to the grid. This meter keeps track of it, and then I get that energy back at night as a 90% credit. The energy company takes 10%off the top because they can, and they are acting as my battery, which is convenient forme with an on-grid system.
I’ll show you what the app looks like in a second, which shows how much solar is actually making in real-time. But yeah, the inspector came by, checked all the wiring, made sure none of the cables were touching the roof, and said we could flip the switch. I think it’s been a pretty fun project. Since my panels are in the sun all day long, not shaded by any trees, or not on the wrong side of the house, these will pay themselves off in about 9 years. That’s without any government incentives. If we do factor in the state and federal incentives, they’ll pay themselves off in about 6 years.
So these panels will keep making electricity throughout my lifetime and keep producing power even long after I’m gone. Which is pretty awesome. Remember, these are ballpark numbers that I’ve estimated. I do have an app that keeps track of everything for me. So I’ll probably make a follow-up video in about a year to see if my estimates are correct.
Do it Yourself Solar Power System: Monitoring by App
If we look at the app currently on my phone, it’s telling us how much energy we are generating in real-time. So 7,671watts. And over the lifespan of my solar panels, they’ve generated 843-kilowatt hours. And what’s cool is we can go into today’s energy, right here, and see exactly the solar projection it’s made. In the morning, the sun came out and started making more electricity throughout the day. If we go back a day, we can see that this day was pretty cloudless until about noon, and then clouds kind of like came over and started blocking the solar panels a little bit. But we still made 48 kilowatt-hours of energy.
And the last thing I want to show you is if we go over right here, we can see the production per module. So as the day progresses, you can see which modules might be blocked by shade from a tree or shade from your roof, and you can see that they’re all working. The financial incentive to doing solar panels is worth it all by itself. But the whole less air pollution and saving the planet thing is pretty cool too.
Personally, I kind of like the do-it-yourself side of things, but I totally understand if you want someone else to install it for you. I’ll always be hanging out down in the comments to answer some questions if you have any. And I’ll probably make a follow-up video in about a year or so to kind of update you and see how it’s been producing for me. So make sure you’re subscribed. Thanks a ton for watching, and I’ll see you around.


Comments
Comments are closed.