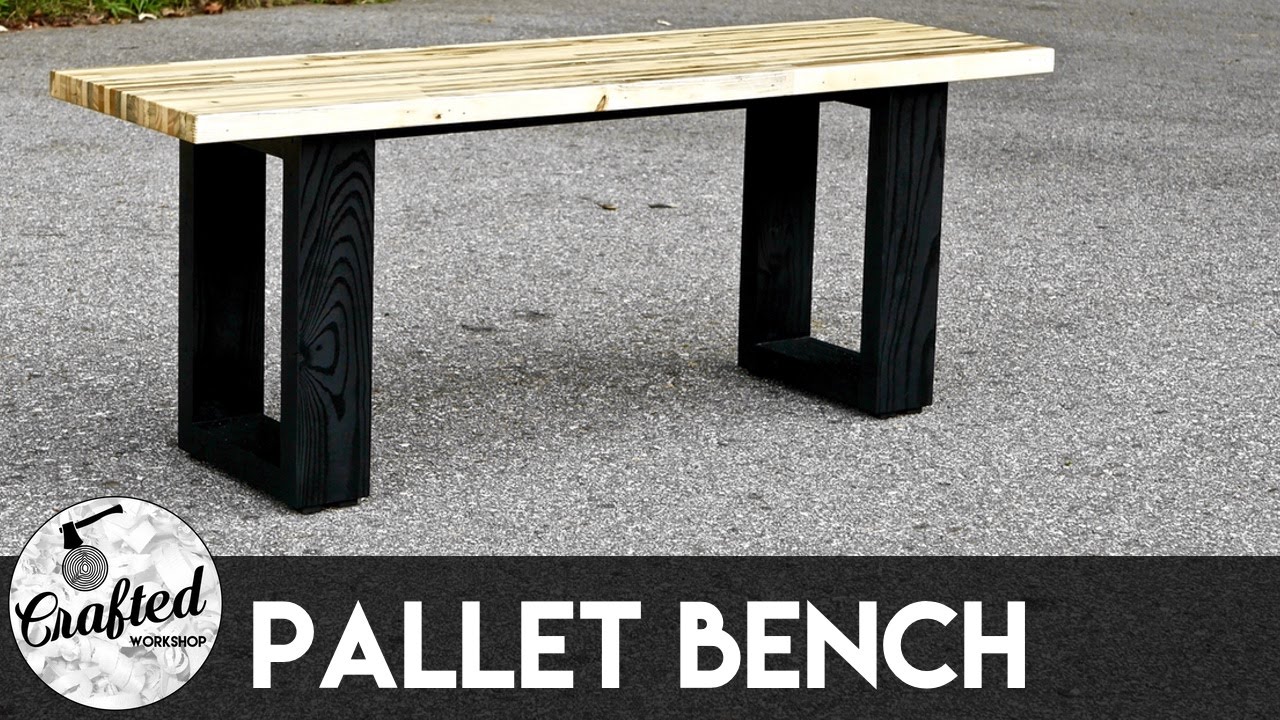
In this article, “How To Build A Modern Pallet Wood Bench | Crafted Workshop,” you’ll find a detailed guide on constructing a modern bench using reclaimed pallet wood. The video, created by Crafted Workshop, takes you through each step, from disassembling the pallets to milling the wood and assembling the bench. The article also mentions that you can adapt the same design to create other furniture pieces like a coffee table or headboard. Additionally, the author shares their plans for the remaining pallet wood and provides information on other pallet wood projects for you to explore.
The video begins with Johnny Brook from Crafted Workshop introducing the project and sharing his approach to building the modern bench from pallet wood. He starts by explaining the first step of disassembling the pallets, outlining three main options for this process. Johnny then moves on to removing any metal from the wood, emphasizing the importance of doing this if you plan to use tools like a planer, jointer, or table saw. He proceeds to guide viewers on milling the wood, laying out the design, and gluing and nailing the strips together to form the bench top. Johnny also provides tips on applying the finish, assembling the base, and adding rubber feet to the legs. Overall, this video offers a comprehensive tutorial on building a modern pallet wood bench.
How To Build A Modern Pallet Wood Bench
Building your own modern pallet wood bench can be a rewarding and fulfilling project. Not only will you have a unique and stylish piece of furniture, but you’ll also have the satisfaction of knowing you built it yourself. In this comprehensive guide, we will walk you through each step of the process to help you create your own beautiful pallet wood bench.
Disassembling the pallets
The first step in building your pallet wood bench is to disassemble the pallets. There are a few different methods you can use to accomplish this. One option is to pry the slats off with a tool. There are many choices for tools that can help with this task, and we recommend using one that suits your needs. Another option is to cut the centers of the slats with a circular saw. While this method may result in some loss of length, it saves you the hassle of removing nails later on. Finally, you can cut the slats from the supports using a reciprocating saw. This method allows you to cut through the nails and separate the slats easily.
Removing metal from the wood
Once you have disassembled the pallets, it’s important to remove any metal from the wood. This includes nails, staples, screws, and other fasteners. It’s crucial to remove all of these metal pieces, especially if you plan on milling the pallet wood with tools like a planer, jointer, or table saw. Leftover nails can damage the blades of these tools, leading to expensive replacements. Take the time to inspect each slat and remove any metal you find.
Milling the wood
After removing the metal, it’s time to mill the wood to prepare it for your bench. This process involves flattening one face of the slats using a jointer, bringing the pieces down to their final thickness with a planer, and squaring up one edge of the slats at the jointer. You will then cut the slats to their final width using a table saw and square up each end of the strips at the miter saw. This careful milling process ensures that your bench top will be flat, smooth, and properly sized for assembly.
Laying out the design
With your milled slats ready, it’s time to lay out the design for your bench top. Determine the final dimensions you want for your bench and leave some extra room for final cleanup. For example, if you want a bench top that measures roughly 43 inches by 13 inches, lay out the strips with a few extra inches on each side. This will allow you to make any necessary adjustments during the assembly process.
Gluing and nailing the strips
Once the design is laid out, it’s time to start assembling your bench top. Use a flat reference surface, such as a piece of scrap MDF, to ensure a straight and even glue-up. Apply glue to each strip and use brad nails to secure them to the piece behind. Continue gluing and nailing the strips until you reach your final width. Once the glue has dried, trim the ends of the bench to their rough length using a miter saw.
Trimming the ends of the bench
After trimming the ends of the bench, it’s time to flatten one side of the bench top. Attach the bench top to a flat reference surface, such as the same piece of MDF used for the glue-up, using countersunk screws. This will serve as a planer sled, allowing you to flatten one side of the bench top at the planer. Carefully flatten the surface, ensuring it is smooth and even.
Sanding the bench top
With one side of the bench top flattened, it’s time to sand the surface to achieve a smooth finish. Start with a coarse grit sandpaper, such as 80 grit, and work your way up to finer grits, such as 120 and 180. This process will remove any roughness and imperfections, leaving you with a polished and refined bench top. Use a block plane to transfer the edges and give them a light sanding for a finished look.
Applying the finish
Once the bench top is sanded to your satisfaction, it’s time to apply the finish. For outdoor use, we recommend using spar urethane. This type of finish has additives that protect the wood from UV damage and is slightly flexible to account for seasonal wood expansion and contraction. Apply multiple coats of spar urethane using a foam brush, sanding lightly between coats for a smooth, satin finish.
Building the legs
To complete your pallet wood bench, you’ll need to build the legs. Use 2×4 supports to create the legs, cutting two pieces at 15 inches long for the uprights and two pieces at seven and a half inches long for the center connectors. Assemble the legs using pocket screws and exterior-rated screws for durability. Additional support pieces can be added to reduce sagging in the bench top and provide lateral stability.
Assembling the bench
Once both the bench top and the legs have cured, it’s time to assemble your pallet wood bench. Attach the legs to the bench top from below using exterior screws, pre-drilling and countersinking the holes for a clean finish. Finally, add rubber feet to each leg to keep them off the ground and protect against water damage. Your beautiful and modern pallet wood bench is now complete!

This image is property of i.ytimg.com.
Conclusion
Building a modern pallet wood bench is a rewarding and enjoyable project that allows you to create a unique piece of furniture. By following these steps and taking your time with each stage of the process, you can create a bench that is not only functional but also aesthetically pleasing. Whether you use it as a bench, coffee table, bar top, or headboard, this design can be easily modified to suit your needs. We hope you have found this comprehensive guide helpful in your own pallet wood bench building journey. Enjoy your new piece of furniture and the satisfaction of knowing you built it yourself!

This image is property of images.unsplash.com.


