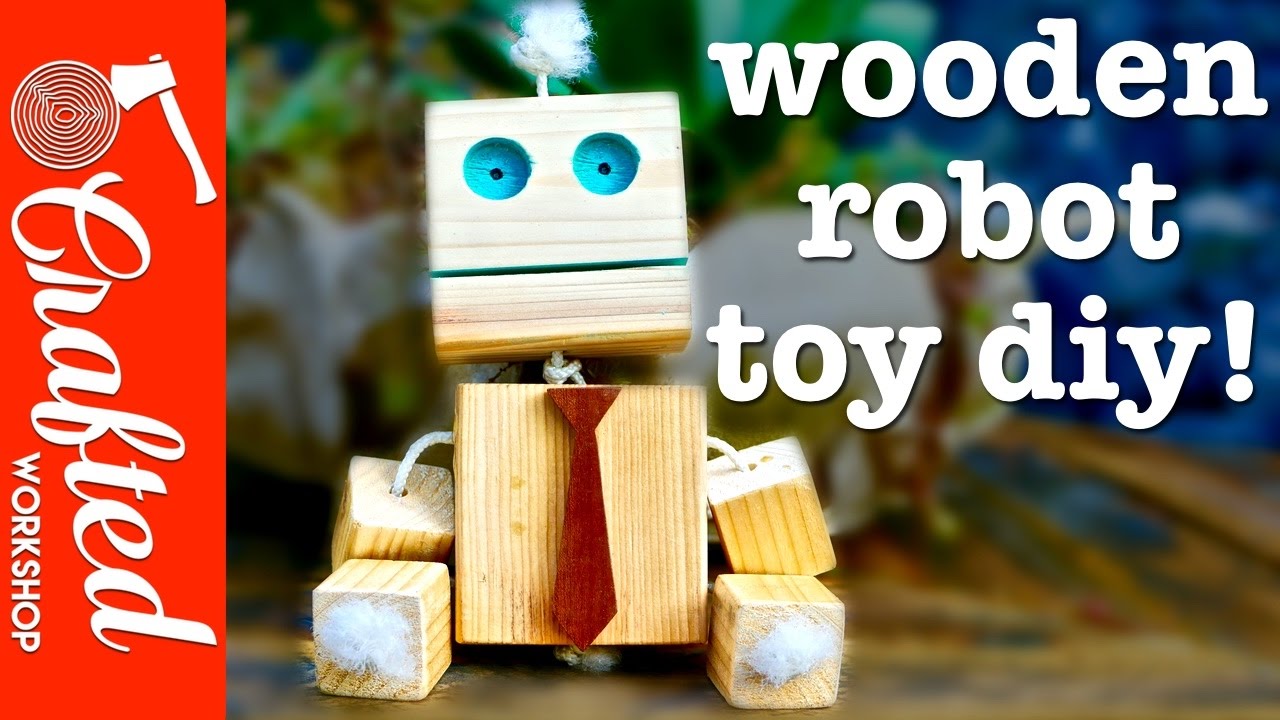
Hey there! In this video by Crafted Workshop, Johnny Brook is going to show you how to build an awesome wooden robot toy. He starts off by cutting a slot for the robot’s mouth and then proceeds to cut out the head and body using three and a half-inch squares. After that, he drills holes for the eyes and then moves on to cutting and drilling the arms and legs. Once all the pieces are cut and sanded, he adds some color and finishes it off with a spray polyurethane. Finally, Johnny demonstrates the assembly process, threading the rope through the head and body to attach the arms and legs. It’s a fun and simple project that would make a great gift for children, and it’s also a great way to use up any scrap wood you may have lying around. So, sit back, relax, and enjoy this step-by-step guide to building a wooden robot toy!
Big shout-out to Crafted Workshop for sharing this awesome tutorial on how to make a wooden robot toy. With clear instructions and practical tips, this video will guide you through the entire process of creating your own robot toy from start to finish. Whether you’re a DIY enthusiast or looking for a fun project to do with your kids, this wooden robot toy is perfect to unleash your creativity and build something truly unique. So grab your tools, gather your materials, and get ready to embark on a delightful journey of crafting your very own wooden robot toy. Trust us, this project will leave you with a big smile on your face and a one-of-a-kind creation that you can cherish for years to come. Happy building!
Tools and Materials
To build your wooden robot toy, you will need the following tools and materials:
1.1 Table saw
A table saw will be used to cut the slot for the robot’s mouth and other pieces.
1.2 Forstner bit
A Forstner bit is needed to drill holes for the robot’s eyes.
1.3 Drill press
A drill press with a fence can be used to make repeated holes for the eyes, or a handheld drill can be used as well.
1.4 Handheld drill
A handheld drill can be used to drill holes for the eyes if a drill press is not available.
1.5 Oscillating belt sander
An oscillating belt sander is used to sand the wooden pieces for the robot.
1.6 Bandsaw
A bandsaw can be used to cut a tie for the robot to add some flair.
1.7 Spray-paint
Spray-paint will be used to add color to the robot’s head and mouth.
1.8 Spray polyurethane
Spray polyurethane can be applied as a finish to protect the wood and give it a nice sheen.
1.9 Rope
Rope is needed to connect the different parts of the robot.
1.10 Five-minute epoxy
Five-minute epoxy can be used to secure the rope in place and attach the arms and legs to the body.

This image is property of i.ytimg.com.
2. Cutting the Slot for the Robot’s Mouth
The first step in building your wooden robot toy is cutting the slot for the robot’s mouth. This can be done using a table saw. Set the depth of cut at about a quarter of an inch and the fence set at about an inch. Run an 8-foot long 2×4 over the table saw to cut the mouth slot.
3. Cutting the Head and Body
Next, cut out the head for the robot. The head and body should be three and a half inch squares. Simply cut a three and a half inch piece from your 2×4 to make the head. The remaining piece should be left with a square with a slot for the mouth.
4. Drilling Holes for the Eyes
Using a Forstner bit, drill a few holes for the robot’s eyes. This can be done using a drill press with a fence to make repeated holes, or a handheld drill can be used as well. The Forstner bit will leave a little hole in the center of the bigger hole, giving it an eye-like appearance.
5. Drilling Holes in the Body
Drill holes in the body of the robot to feed the rope through. Start by drilling one vertical hole roughly centered in the piece, going all the way through the head. Make sure to use a bit large enough for the rope to thread through later. Also, ensure that there are no chips or shavings left in the hole to ensure easy threading of the rope.

This image is property of pixabay.com.
6. Drilling Holes in the Arms and Legs
Using the same method as drilling the holes in the body, drill holes in the arms and legs of the robot. Cut the arms and legs from a 2×2 piece of material. Set a stop block on the miter saw to an inch and a half and make inch and a half cubes. Drill holes in the center of the arms and legs to attach them to the body later.
7. Sanding the Pieces
After drilling the necessary holes, it’s time to sand the wooden pieces of the robot. If you have a large number of pieces, like 30, an oscillating belt sander can make quick work of sanding the 2×4 pieces. However, for the smaller 2×2 pieces, you may need to sand them by hand to avoid any accidents.

This image is property of pixabay.com.
8. Adding Flair to the Robot
To add some flair to your robot, you can cut a tie for him on a bandsaw. Use a small scrap piece of wood and rough out the shape on the bandsaw. Then, sand it smooth by hand. This can give your robot a unique and playful look.
9. Painting the Head
To add color to the robot’s eyes and mouth, spray-paint the entire front surface of the head. Be sure to fill in the eyes and mouth with paint and then sand it off once it has dried. This will leave you with painted eyes and mouth that provide a nice contrast against the wood.

This image is property of pixabay.com.
12. Conclusion
In conclusion, building a wooden robot toy can be a fun and creative project. By following the steps outlined above and using the necessary tools and materials, you can create a unique and personalized toy for yourself or your child. Whether it’s for a Maker Faire or just for some family fun, this DIY project is a great way to spend some time being crafty. So go ahead and get started, and enjoy the process of bringing your wooden robot toy to life!


