


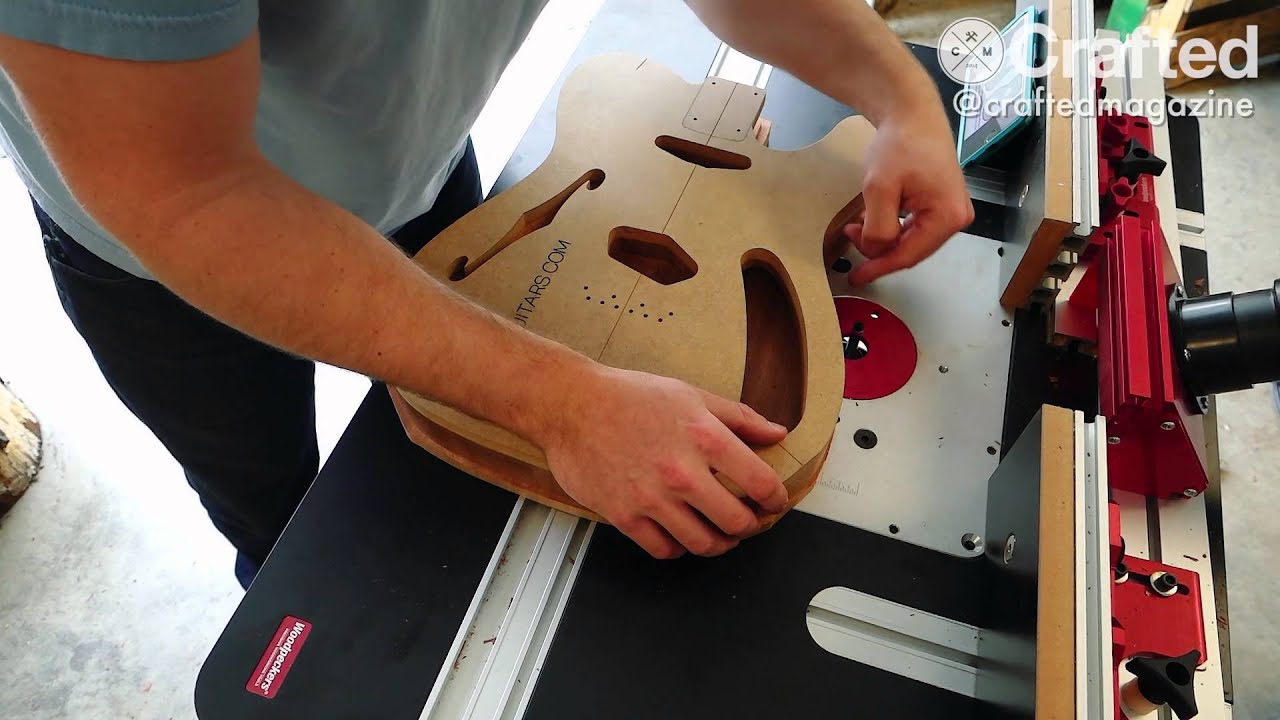
Alright, so check it out. This is part 3 of the DIY Guitar Build series by Crafted Workshop. In this video, you’ll get to see how they use a router table to shape the guitar body. They’ll be using the Woodpecker’s router table and precision router lift, making changing the bits super easy. The video also shows the process of routing the pickup cavities, control cavity, and even the F hole using a down-cut spiral bit. The results are clean and free of tear-out, except for the neck pocket, which needs a bit more work. Overall, you’ll see how the guitar body is starting to take shape and looking pretty guitar-like.
Part 3 – Shaping the Guitar Body with a Router Table
DIY Guitar Build Series: Part 2
DIY Guitar Build Series: Part 1
Introduction
Welcome to Part 3 of our comprehensive guide on building your own guitar! This section will focus on shaping the guitar body using a router table. This step is crucial in achieving your instrument’s desired aesthetic and functionality. By following these steps and utilizing the appropriate materials and tools, you will be able to create a beautifully shaped guitar body that fits your vision perfectly.
Materials and Tools
Before diving into the steps, let’s review the materials and tools you will need to shape the guitar body with a router table. The materials required include a solid block of wood for the body (such as mahogany or alder), sandpaper, and masking tape. As for the tools, you will need a router with an appropriate bit, a router table, clamps, a straight edge, a pencil, and a measuring tape. Having these materials and tools ready beforehand will ensure a smooth and efficient shaping process.

Step 1: Setting up the Router Table
Begin by setting up the router table. Make sure it is securely fastened to a stable surface, such as a workbench. Adjust the height of the router table to a comfortable level that allows you to work easily. It is important to have a clear and well-lit workspace to ensure precision throughout the shaping process. Once the router table is properly set up, you can move on to the next step.
Step 2: Routing the Pickup Cavities
Now that the router table is ready, it’s time to route the pickup cavities. Use a pencil to mark the desired position of the pickups on the guitar body. Measure the exact dimensions of the pickups and transfer these measurements onto the body. Secure the body to the router table using clamps, ensuring it is tightly held in place. With the appropriate bit installed in the router, carefully route the pickup cavities according to the marked dimensions. Take your time during this step to ensure the cavities are symmetrical and properly aligned.
Step 3: Routing the Control Cavity
After routing the pickup cavities, proceed to route the control cavity. Using a pencil, mark the location and dimensions of the control cavity on the body. En route the control cavity using the proper bit with the body securely clamped to the router table. This cavity will house the guitar’s control components such as the volume and tone knobs, switches, and wiring. Ensure the cavity is deep enough to accommodate these components while providing enough space for easy access and adjustment.
Step 4: Routing the F Hole
Next, it’s time to route the F hole if your guitar design incorporates one. The F hole adds a unique and distinctive aesthetic to the guitar body, reminiscent of traditional hollow-body guitars. Using a straight edge and a pencil, carefully mark the shape and size of the F hole on the designated area of the body. Secure the body on the router table and precisely route the F hole, following the marked lines. Be cautious and take your time while routing, as any mistakes, can be difficult to rectify once the routing is complete.
Step 5: Fixing Tear Out in the Neck Pocket
During the routing process, there is a possibility of tear-out occurring, particularly in the neck pocket area. Tear out can happen when the router bit exits the wood, causing splintering or chipping. If you encounter tear out in the neck pocket, fixing it before proceeding is essential. To solve this issue, use sandpaper to smooth out any uneven surfaces or splintered edges carefully. Pay close attention to detail to ensure a seamless transition between the neck pocket and the body.
Step 6: Finishing Touches
Now that the major routing work is complete, it’s time to focus on the finishing touches. Use sandpaper to smoothen any rough areas or sharp edges on the guitar body. It’s important to achieve a smooth and even finish to enhance the overall comfort and aesthetics of the instrument. Once the sanding is done, wipe the body with a clean rag to remove any dust or debris. This will prepare the body for a finish or paint application.
Step 7: Final Result
Congratulations! You have successfully shaped the guitar body using a router table. Take a step back and admire your handiwork. If applicable, the body should now have clean and precise pickup cavities, a functional control cavity, and a well-routed F hole. The tear out in the neck pocket has been successfully fixed, ensuring a professional finish. By following these steps and putting in the necessary time and attention to detail, you have created a unique guitar body to your vision.
Conclusion
In this article, we explored the process of shaping the guitar body using a router table. We discussed the materials and tools required and provided a step-by-step guide on each aspect of the shaping process. By following these steps and approaching the task with patience and precision, you can create a beautifully shaped guitar body that matches your desired aesthetic and functionality. Remember always to prioritize safety when using power tools, and consult a professional if you need any further guidance. Now that you have completed this crucial step, you are closer to building your custom guitar. Happy building!


