


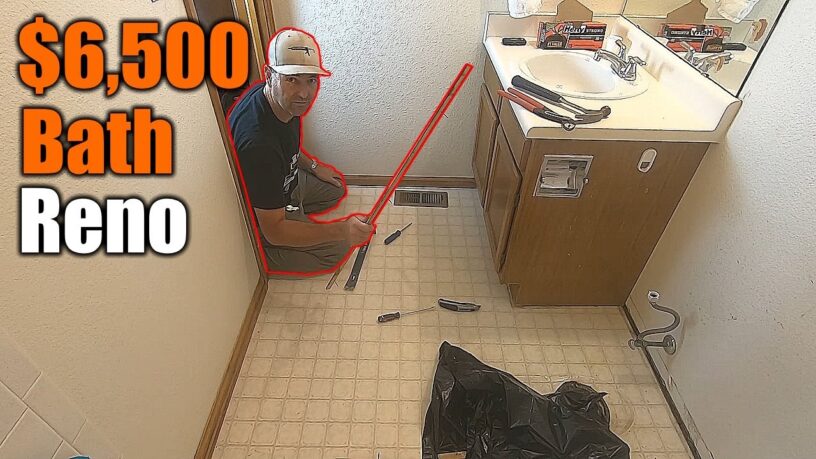
Imagine transforming your outdated bathroom into a bright and modern space without breaking the bank. In the video “Step-by-Step Bathroom Remodel: DIY with The Handyman,” the host takes you through a comprehensive $6,500 bathroom remodel that you can tackle on your own. This informative video shares the entire process, from removing old fixtures to installing new ones and tiling the floor. The before and after shots of the bathroom are truly inspiring, and the host emphasizes that anyone can handle this DIY project, particularly in newer homes. Additionally, the host mentions a live stream on his business channel where he will be discussing various topics, including customer service. Don’t miss out on this engaging and helpful tutorial by The Handyman!
Get ready to roll up your sleeves and transform your bathroom into a beautiful space with a step-by-step tutorial by The Handyman. In this video, you’ll learn how to remodel a hall bathroom in a 1990s-built house, witnessing every stage of the process. The host highlights the ease of remodeling in newer homes compared to older ones and showcases stunning before and after shots. From removing old fixtures to tiling the floor, this $6,500 bathroom remodel is a true DIY project that anyone can handle. Make sure to also check out the host’s business channel for an upcoming live stream discussing various topics, including customer service. Join The Handyman on this exciting journey to revamp your bathroom!
Before You Begin
Assessing the Bathroom
Before diving into your bathroom remodel, it’s essential to assess the current state of your bathroom. Take note of any issues or problem areas that need to be addressed. Look for signs of water damage, leaks, or mold. Evaluate the layout and functionality of the space. Are there any areas that feel cramped or inefficient? Understanding the existing conditions of your bathroom will help you plan and prioritize your remodeling project effectively.
Setting a Budget
Remodeling a bathroom can quickly become expensive, so it’s crucial to set a budget before starting the project. Consider the scope of the remodel and determine how much money you’re willing to spend. Research the average costs of materials and labor in your area to get an idea of what you can expect to pay. Be sure to leave some room in your budget for unexpected expenses that may arise during the renovation process. Setting a budget will help you stay on track and avoid overspending.
Creating a Timeline
Remodeling a bathroom is a time-consuming project, so it’s essential to create a realistic timeline. Consider the availability of tools, materials, and your own schedule when planning out the timeline. Break down the project into smaller tasks and allocate the appropriate amount of time for each. Be sure to account for any additional time needed for unexpected issues or delays. Having a timeline will help you stay organized and ensure that the project progresses smoothly.
Planning the Design
Determining Style and Theme
Before selecting fixtures and finishes for your bathroom, it’s essential to determine the overall style and theme you want to achieve. Consider your personal preferences and the existing style of your home. Do you prefer a modern, minimalist look or a more traditional, rustic feel? Look for inspiration in home design magazines, websites, and social media platforms. Once you have a clear vision of the style and theme, it will be easier to select fixtures and finishes that fit your design goals.
Choosing Fixtures and Finishes
When it comes to choosing fixtures and finishes for your bathroom, there are endless options to consider. Start by selecting a cohesive color scheme that complements your chosen style and theme. Then, choose a bathtub, shower, toilet, and sink that not only match your aesthetic preferences but also meet your functional needs. Consider factors such as durability, ease of cleaning, and water efficiency when making your selections. Additionally, choose finishes for your fixtures, such as chrome, brushed nickel, or matte black, that tie the entire look together.
Creating a Layout
Before beginning any actual construction work, it’s crucial to plan out the layout of your bathroom. Consider the existing plumbing and electrical connections and determine if any changes need to be made. Think about the placement of your fixtures to optimize the functionality and flow in the space. Sketch out a floor plan, including the location of the bathtub, shower, toilet, sink, and any additional storage or vanity space. Taking the time to create a well-thought-out layout will ensure that your remodeled bathroom is both beautiful and practical.
Gathering Tools and Materials

Basic Hand Tools
Before you can start your bathroom remodel, it’s important to gather the necessary tools. Basic hand tools that you may need include a hammer, screwdrivers (both Phillips and flathead), pliers, a tape measure, a level, a utility knife, a chisel, and a pry bar. These tools will come in handy during various stages of the remodel, from demolition to installation.
Power Tools
Power tools can make your bathroom remodel significantly easier and more efficient. Some power tools that you may want to have on hand include a circular saw, a reciprocating saw (also known as a sawzall), a drill, an impact driver, a jigsaw, and a tile saw. These tools will help you cut through materials, remove old fixtures, and make precise installations.
Safety Equipment
Safety should be a top priority during your bathroom remodel. Be sure to have safety equipment such as safety glasses, work gloves, ear protection, and a dust mask or respirator. It’s also a good idea to have a first-aid kit on hand in case of any minor injuries or accidents.
Building Materials
Depending on the scope of your bathroom remodel, you may need various building materials. Common materials include drywall, cement backer board, tile adhesive, grout, caulk, nails, screws, and wood for framing. It’s important to have all the necessary materials on hand before you begin the construction process to avoid unnecessary delays.
Plumbing and Electrical Supplies
If you’re planning to make changes to the plumbing or electrical systems in your bathroom, you’ll need the appropriate supplies. This may include new pipes, fittings, valves, junction boxes, wire, switches, outlets, and lighting fixtures. It’s essential to consult with a licensed plumber or electrician to ensure that everything is installed correctly and up to code.
Demolition
Removing Old Fixtures and Fittings
Demolition is often the first step in a bathroom remodel. Start by removing any old fixtures and fittings, such as the toilet, sink, bathtub, shower, and vanity. Use your tools, such as a pry bar and a reciprocating saw, to carefully remove these items without causing damage to the surrounding walls or flooring.

Disposing of Debris Properly
As you demolish your bathroom, you’ll generate a significant amount of debris. It’s important to dispose of this debris properly to avoid any safety hazards or legal issues. Rent a dumpster or schedule a waste disposal service to remove the debris from your property. Follow local regulations and guidelines for proper disposal of construction waste.
Plumbing and Electrical Work
Shutting Off Water and Electricity
Before making any changes to the plumbing or electrical systems in your bathroom, you must shut off the water and electricity. Locate the main water shut-off valve and turn it off to prevent any leaks or flooding. Similarly, locate the electrical panel and turn off the power to the bathroom to avoid any electrical hazards. It’s crucial to work safely and take the necessary precautions when dealing with water and electricity.
Replacing or Relocating Pipes
If you’re planning to reconfigure the layout of your bathroom, you may need to replace or relocate pipes. Consult with a licensed plumber to determine the best course of action. They will be able to advise you on any necessary changes and make sure that everything is done correctly and up to code.
Installing New Plumbing Fixtures
Once the necessary plumbing changes have been made, you can proceed with installing new plumbing fixtures. This may include a new toilet, sink, bathtub, or shower. Follow the manufacturer’s instructions and use the appropriate tools and materials to ensure a proper installation. It may be helpful to consult with a plumber or watch tutorial videos to guide you through the process.
Updating Electrical Outlets and Lighting
If you’re planning to update the electrical system in your bathroom, make sure to consult with a licensed electrician. They will be able to advise you on the best course of action and ensure that all changes are made safely and up to code. This may involve installing new outlets, switches, lighting fixtures, or adding additional circuits if needed.
Floor and Wall Preparation
Removing Old Flooring and Baseboards
Before you can install new flooring, you’ll need to remove any existing flooring. This may involve removing tiles, vinyl, or carpeting. Use your tools, such as a pry bar and a utility knife, to carefully remove the flooring without causing damage to the subfloor.

Repairing or Replacing Subfloor
Once the old flooring is removed, assess the condition of the subfloor. If there are any areas of damage or rot, you’ll need to repair or replace the subfloor before proceeding. This may involve cutting out and replacing damaged sections or adding additional support.
Installing Cement Backer Board
To prepare the walls and floors for tiling, you’ll need to install cement backer board. Measure and cut the backer board to fit the desired area, then attach it securely to the walls or subfloor using screws or nails. Make sure to leave a small gap between the boards to allow for expansion.
Applying Waterproofing
In areas such as the shower or bathtub, it’s important to apply a waterproofing membrane to prevent water damage. There are various waterproofing products available, such as liquid membranes or adhesive mats. Follow the manufacturer’s instructions for applying the waterproofing material, making sure to cover all areas that will be exposed to water.
Preparing Walls for Tiling
Before you can start tiling the walls, you’ll need to prepare them properly. This involves cleaning the surface, filling any cracks or imperfections, and applying a primer. Use a level to ensure that the walls are straight and even. Proper wall preparation is crucial for a smooth and long-lasting tile installation.
Tiling the Floor and Walls
Choosing the Right Tiles
When selecting tiles for your bathroom, consider both the aesthetic and practical aspects. Choose tiles that are durable, easy to clean, and water-resistant. Consider the size, shape, and color of the tiles, as well as any patterns or designs you want to incorporate. It’s also important to choose the appropriate tile adhesive and grout for your specific tiles.
Laying Floor Tiles
Start by measuring and marking the center of the room to ensure that your tiles are laid out evenly. Use a notched trowel to apply the tile adhesive, then lay the tiles in the desired pattern, pressing them firmly into place. Use tile spacers to maintain consistent spacing between tiles. Once the adhesive has cured, apply grout to fill the gaps between the tiles, and clean off any excess grout.

Installing Wall Tiles
When installing wall tiles, begin at the bottom and work your way up. Use a notched trowel to apply the tile adhesive to the wall, then press the tiles into place, starting from the center and working outward. Use tile spacers to maintain consistent spacing between the tiles. Allow the adhesive to dry before applying grout and cleaning off any excess.
Grouting and Sealing Tiles
Once the adhesive has dried, it’s time to grout the tiles. Mix the grout according to the manufacturer’s instructions, then use a grout float to apply it to the tiles, working it into the gaps. Wipe off any excess grout using a damp sponge, being careful not to remove too much grout from the gaps. Allow the grout to cure, then apply a grout sealer to protect the tiles and grout from stains and moisture.
Installing Fixtures and Accessories
Mounting Vanity and Sink
Start by assembling the vanity according to the manufacturer’s instructions. Once assembled, position it in the desired location and secure it to the wall using screws or brackets. Install the sink following the manufacturer’s instructions, making sure to connect the necessary plumbing fittings.
Installing Toilet
To install the toilet, start by placing a wax ring on the flange and aligning it with the waste pipe. Carefully lower the toilet onto the wax ring and press it firmly into place. Secure the toilet to the floor using toilet bolts and caps. Connect the water supply line and flush the toilet to ensure it is working properly.
Connecting Faucets and Shower Fixtures
Install the faucets and shower fixtures according to the manufacturer’s instructions. Make sure to connect the necessary plumbing fittings, such as supply lines and drain pipes. Test the fixtures to ensure they are working correctly and fix any leaks or issues that may arise.
Adding Towel Bars and Hooks
Once the major fixtures are installed, it’s time to add the finishing touches. Install towel bars, hooks, and any other accessories according to the manufacturer’s instructions. Make sure to securely attach them to the wall to prevent them from falling or becoming loose over time.
Painting and Finishing Touches
Priming and Painting Walls
If you plan to paint the walls, start by priming them to ensure better paint adhesion and coverage. Once the primer is dry, apply the paint in thin, even coats, allowing each coat to dry before applying the next. Use painter’s tape to protect any areas that should not be painted, such as trim or fixtures.
Painting Baseboards and Trim
Painting the baseboards and trim can give your bathroom a polished and finished look. Clean and prepare the surfaces before applying paint. Use painter’s tape to protect any adjacent surfaces, then apply the paint using smooth, even strokes. Allow the paint to dry completely before removing the tape.
Installing Mirrors and Medicine Cabinets
To install mirrors or medicine cabinets, start by measuring and marking the desired location on the wall. Use wall anchors or screws to secure them in place. Make sure they are level and secure before attaching any additional hardware or trim.
Adding Decorative Accessories
To add the final touches to your remodeled bathroom, consider adding decorative accessories such as artwork, plants, or storage containers. Choose items that complement the style and theme of your bathroom. These accessories can add personality and warmth to the space, making it feel complete and inviting.
Conclusion
Enjoying your Newly Remodeled Bathroom
Congratulations! You’ve successfully completed your DIY bathroom remodel. Take a moment to appreciate your hard work and enjoy your newly transformed space. Revel in the functionality and beauty of your updated bathroom.
Reflecting on the DIY Experience
Remodeling a bathroom yourself can be a rewarding and fulfilling experience. Take some time to reflect on what you’ve learned throughout the process. Consider the challenges you faced, the skills you developed, and the satisfaction of completing a project on your own. Whether you decide to tackle another DIY project or hire a professional in the future, the knowledge and experience gained from this remodel will stay with you for years to come.


