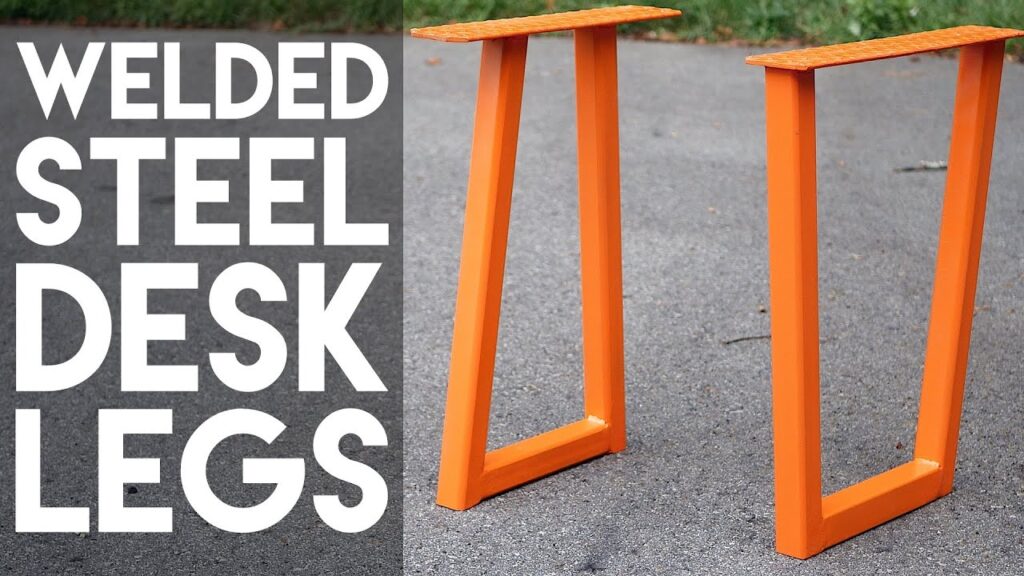
Hey there! In this article, titled “How to Build a Walnut Plywood & Steel Desk: Part 1 – Welding the Steel Legs,” we’ll be delving into the process of building a desk with welded steel legs. The video, created by Crafted Workshop, will guide you through the steps of cutting the metal pieces down to size, cleaning and welding the legs together, and finishing them off with paint. The materials used include ¼” thick 2″ x 2″ square tubing and ¼” steel plate, along with some handy tools like a grinding wheel and a Lincoln electric power mig 210 MP welder. So, if you’re interested in tackling your first welding project or simply love working with metal, this article and video will provide you with all the details you need to create a sturdy and stylish desk.
Materials Used To Build The Steel Legs
To build the steel legs for your desk, you will need approximately 11 feet of ¼” thick 2″ x 2″ square tubing and two pieces of ¼” steel plate, each measuring 4″ x 22″. The square tubing will provide the sturdy frame for the legs, while the steel plates will be used for mounting the legs to the desk surface.
Tools Used To Build The Steel Legs
To complete this project, you will need a few essential tools. These tools include a flux core MIG welder, a grinding wheel, an angle grinder, a plasma cutter, a cut-off wheel, magnetic squares, a drill press, and a countersink bit. These tools will help you cut and shape the metal pieces, prepare them for welding, and assemble the legs securely.

This image is property of i.ytimg.com.
Cutting and Sizing the Metal Pieces
The first step in building the legs is to cut the metal pieces to size. The long pieces of the legs should measure around 27 inches and have a 5-degree angle cut on both ends in parallel. The center connecting pieces should be approximately 12 inches long, with opposing angles cut. These 5-degree angles will give the finished legs a slight splay, adding visual interest to your desk.
Preparing the Metal for Welding
Before you begin welding the legs together, it’s important to prepare the metal surfaces. Use a grinding wheel to remove any rust and mill scale from the metal pieces. While it may not be necessary since you’ll be using flux core MIG welding, this step ensures better adhesion and cleaner welds. Additionally, choose the appropriate welding wire for your project and set up your welder for flux core MIG welding. Start by making a few tack welds to temporarily hold the pieces together.
This image is property of images.unsplash.com.
Welding the Legs Together
Once the metal pieces are cleaned and tack welded, it’s time to proceed with the actual welding. Run beads on each side of the joints to create strong and secure connections. On the second set of legs, you can choose not to run a bead on the bottom. The three beads alone will be strong enough to support the desk, and by not running a bead on the bottom, you won’t need to grind them flush for the legs to sit flat on the ground.
Grinding and Finishing the Welds
After the welding is complete, take the time to grind down the welds and smooth them out for a clean and seamless look. Use a grinding wheel on your angle grinder to flush the welds with the surface of the tubing. Once that’s done, switch to a flat disc to further smooth out the welds. You may also need to remove any surface rust that has formed. Sand the legs with 80 grit sandpaper or use a random orbital sander, and clean them with denatured alcohol to ensure a smooth surface for painting.
This image is property of images.unsplash.com.
Painting and Finishing the Legs
To finish off your steel legs, start by priming them with a gray automotive primer from a reputable brand like Rust-Oleum. This step will create a better surface for the final paint color. Choose a paint color that complements your desired aesthetic. Consider painting the legs in a bright orange color to add a pop of personality to your desk. Finally, drill holes in the legs for mounting them to the desk surface and countersink the holes to ensure a flush fit.
Conclusion
In conclusion, the process of building steel legs for your desk involves cutting and sizing the metal pieces, preparing them for welding, welding the joints together, grinding and finishing the welds, and finally painting and finishing the legs. With the right materials and tools, you can achieve a sturdy and stylish set of steel legs that will support your desk beautifully. In the next part of this series, you will learn how to build the walnut veneer plywood top that will complete your desk project. Stay tuned for more welding and metalworking content!
This image is property of images.unsplash.com.


