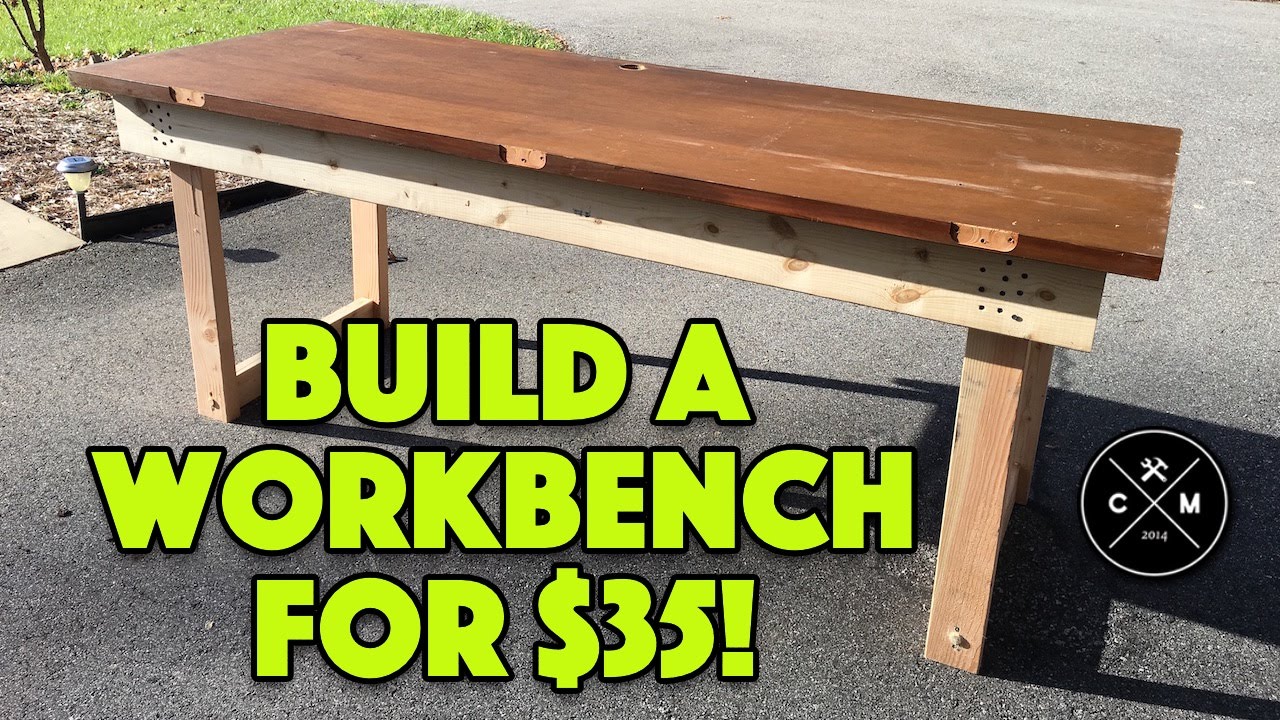
Welcome back to another Craft and Magazine video! Today, we’re going to show you how to build a workbench using a solid core door and some lumber. This project is perfect for any DIY enthusiast looking for a simple and affordable workbench solution. With step-by-step instructions and a total cost of around $35, including a Forstner bit for drilling holes, this workbench is sure to be a great addition to your workshop. In addition to the basic workbench, we’ll also mention another component with drawers that can be added for extra storage. So let’s get started and build the workbench of your dreams!
Materials Needed
To build a sturdy and functional workbench, there are several materials you will need:
Solid Core Door
The foundation of your workbench will be a solid core door. This provides a sturdy and flat surface for all your projects.
Two 2x6s
You will need two 2x6s to serve as the base of your workbench. These will provide stability and support for the solid core door.
Two 2x4s
The 2x4s will be used to create the frame of the workbench. They will be attached to the 2x6s and provide additional strength and structure.
5/8 inch dowel
A 5/8 inch dowel will be used to connect the solid core door and the 2x4s. This will ensure that the workbench is securely held together.
Forstner bit
A Forstner bit is necessary for drilling the dowel holes in the 2x4s. This specialized bit will create clean and precise holes for a snug fit.
Screws
You will need screws to secure the dowel and any additional attachments or supports. Choose screws that are appropriate for the thickness of the materials you are working with.
Optional: Pocket Hole Screws
If you want to further enhance the stability and strength of your workbench, you can use pocket hole screws. These screws create a strong bond between the solid core door and the 2x6s.

Tools Needed
In addition to the materials, you will also need a few tools to complete the project:
Hide-A-Horse Sawhorses
A pair of Hide-A-Horse sawhorses will provide a stable and elevated workspace. These sawhorses are adjustable and portable, making them ideal for this project.
Circular Saw
A circular saw is necessary for cutting the lumber to the desired length. Make sure to use the appropriate blade for cutting through wood.
Drill
A drill is essential for drilling the dowel holes and attaching the screws. Choose a drill with enough power to handle the materials you will be working with.
Clamps
Clamps will come in handy when securing the 2x6s and 2x4s together. They will help ensure that the pieces are aligned properly during assembly.
Measuring Tape
Accurate measurements are crucial for a well-built workbench. A measuring tape will help you determine the desired dimensions and ensure that everything fits together perfectly.
Step 1: Planning and Preparation
Before diving into the construction process, take some time to plan and prepare.
Measure and Determine the Desired Dimensions
First, measure the space where you plan to place your workbench. Take into account the available area and any specific requirements you may have. Consider the width, depth, and height of the workbench, and choose the dimensions that best suit your needs.
Choose the Appropriate Height for the Workbench
The height of your workbench is an important factor to consider. Think about the tasks you will be performing and find a comfortable height that allows you to work efficiently without straining your back. Generally, a height of around 36 inches is recommended, but you can adjust it to your preference.
Gather all the Necessary Materials and Tools
Once you have determined the dimensions of your workbench and decided on the appropriate height, gather all the materials and tools listed. Make sure you have everything on hand before you begin to avoid any delays or interruptions during the construction process.
Set up a Workspace on the Hide-A-Horse Sawhorses
To create a stable and elevated workspace, set up the Hide-A-Horse sawhorses. Adjust them to a comfortable height and ensure that they are properly secured. This will provide a solid foundation for assembling the workbench.
Step 2: Cutting the Lumber
With your workspace prepared, it’s time to start cutting the lumber.
Mark the 2x6s and 2x4s According to the Desired Length of the Workbench
Using a measuring tape, mark the 2x6s and 2x4s according to the desired length of your workbench. Make sure the measurements are accurate and consistent.
Use a Circular Saw to Cut the Lumber Pieces
Once you have marked the lumber, carefully use a circular saw to make the cuts. Follow the marked lines and take your time to ensure clean and straight cuts. Double-check the measurements before cutting to avoid any mistakes.
Make Precise Cuts to Ensure the Pieces Fit Together Properly
Precision is key when cutting the lumber. Ensure that all the pieces are cut to the correct length and are squared off at the ends. This will ensure that they fit together properly during assembly and create a stable and sturdy workbench.
This image is property of images.unsplash.com.
Step 3: Drilling Holes
With the lumber cut to size, it’s time to drill the dowel holes.
Determine the Location for the Dowel Holes on the 2x4s
Decide where you want the dowel holes to be placed on the 2x4s. Typically, it’s best to have at least two dowels evenly spaced on each side of the workbench for added stability.
Mark the Hole Locations and Use a Measuring Tape to Ensure Accuracy
Measure and mark the hole locations on the 2x4s. Use a measuring tape to ensure that the marks are evenly spaced and aligned. Accuracy is crucial to ensure that the dowels fit snugly and securely.
Use a Forstner Bit to Drill the Dowel Holes
Attach a Forstner bit to your drill and set the depth to match the length of the dowel. Carefully drill the dowel holes at the marked locations on the 2x4s. Take your time and apply steady pressure to create clean and precise holes.
Ensure the Holes are Straight and Properly Aligned
After drilling the dowel holes, check to ensure they are straight and properly aligned. Use a straightedge or a level to verify their accuracy. It’s important that the dowels and dowel holes are aligned perfectly to ensure a strong and stable workbench.
Step 4: Joining the Pieces
With the dowel holes drilled, it’s time to start putting the workbench together.
Place the 2x6s Parallel to Each Other on the Hide-A-Horse Sawhorses
Position the two 2x6s parallel to each other on top of the Hide-A-Horse sawhorses. Make sure they are level and securely anchored to the sawhorses. These will serve as the base of your workbench.
Position the Solid Core Door on Top of the 2x6s
Place the solid core door on top of the 2x6s. Ensure that it is centered and aligned properly with the edges of the 2x6s.
Align the Dowel Holes in the 2x4s with the Holes in the Door
Gently align the dowel holes in the 2x4s with the corresponding holes in the door. Take your time to ensure a precise fit. This step is crucial for the stability and strength of the workbench.
Insert the Dowel into the Holes to Connect the Pieces
Carefully insert the dowel into the holes, connecting the 2x4s to the solid core door. It may require a bit of force to slide the dowel all the way in, but be careful not to damage the wood. The dowel should fit snugly into the holes, ensuring a secure connection.
Secure the Dowel with Screws if Desired
For added security, you can use screws to further secure the dowel. Drill pilot holes into the 2x4s and insert screws to hold the dowel in place. This step is optional but can provide extra stability to your workbench.
Optional: Use Pocket Hole Screws to Further Secure the Door and 2x6s
If you want to reinforce the connection between the solid core door and the 2x6s, you can use pocket hole screws. Drill pocket holes into the underside of the door and attach it to the 2x6s using screws. This will create a strong bond and prevent any movement or shifting.
This image is property of images.unsplash.com.
Step 5: Optional Additions
Now that the basic structure of your workbench is complete, you can consider adding some optional features to enhance its functionality.
Consider Adding Additional Support Brackets or Cross Beams for Added Stability
If you anticipate working with heavy objects or performing tasks that require extra stability, you can add additional support brackets or cross beams to your workbench. These can be attached to the underside of the solid core door and provide added strength where needed.
Attach a Vise or Clamping System to the Workbench
To make your workbench even more versatile, consider attaching a vise or clamping system. This will allow you to secure your workpieces firmly in place, providing stability and ease while working on your projects.
Install Drawers or Shelves for Storage
If you need storage space for your tools or materials, adding drawers or shelves to your workbench can be a great solution. This will keep your workspace organized and make it easier to access your tools and supplies while working.
Step 6: Finishing Touches
With the construction of your workbench complete, it’s time to add some finishing touches.
Sand the Workbench to Smooth Any Rough Edges
Using sandpaper or a sanding block, carefully sand the surfaces of the workbench to smooth out any rough edges or imperfections. Pay extra attention to the areas where you made cuts or where the wood meets to ensure a clean and even finish.
Apply a Coat of Paint, Stain, or Varnish to Protect the Wood
To protect the wood and enhance the appearance of your workbench, apply a coat of paint, stain, or varnish. Choose a finish that suits your style and preferences. Ensure that the chosen product is suitable for indoor or outdoor use depending on where your workbench will be located.
Allow the Finish to Dry Completely Before Using the Workbench
After finishing the wood, allow the coat to dry completely before using the workbench. Follow the manufacturer’s instructions for drying time, and make sure that the area is well-ventilated during the process.

This image is property of images.unsplash.com.
Step 7: Testing and Use
Your workbench is now complete and ready to be put to use. Before you start your projects, take the time to perform some tests and ensure everything is in order.
Place the Workbench in a Designated Area
Select a suitable area for your workbench and place it there. Make sure the location is spacious enough for your needs and allows for easy movement around the workbench.
Test its Sturdiness By Placing Weight on the Surface
To test the sturdiness of your workbench, place some weight on the surface. This could be a heavy tool or material. Observe if the workbench remains stable and doesn’t wobble or shift.
Ensure That the Workbench Does Not Wobble or Move
If the workbench does wobble or move, double-check the connections and make any necessary adjustments. It’s crucial to have a sturdy workbench that can withstand the tasks you plan to perform on it.
Conclusion
By following these steps and using the materials and tools listed, you can construct a sturdy and functional workbench that will provide you with a reliable workspace for all your projects. Remember to take accurate measurements, make precise cuts, and ensure proper alignment during assembly for the best results. With your new workbench in place, you’ll be ready to tackle any task with ease and efficiency. Happy building!


